Microsoft Azure Entra ID SCIM v2.0
The following guide will walk you through the process of configuring Ory Polis to use the Microsoft Entra ID SCIM v2.0 directory provider.
Create Azure Application
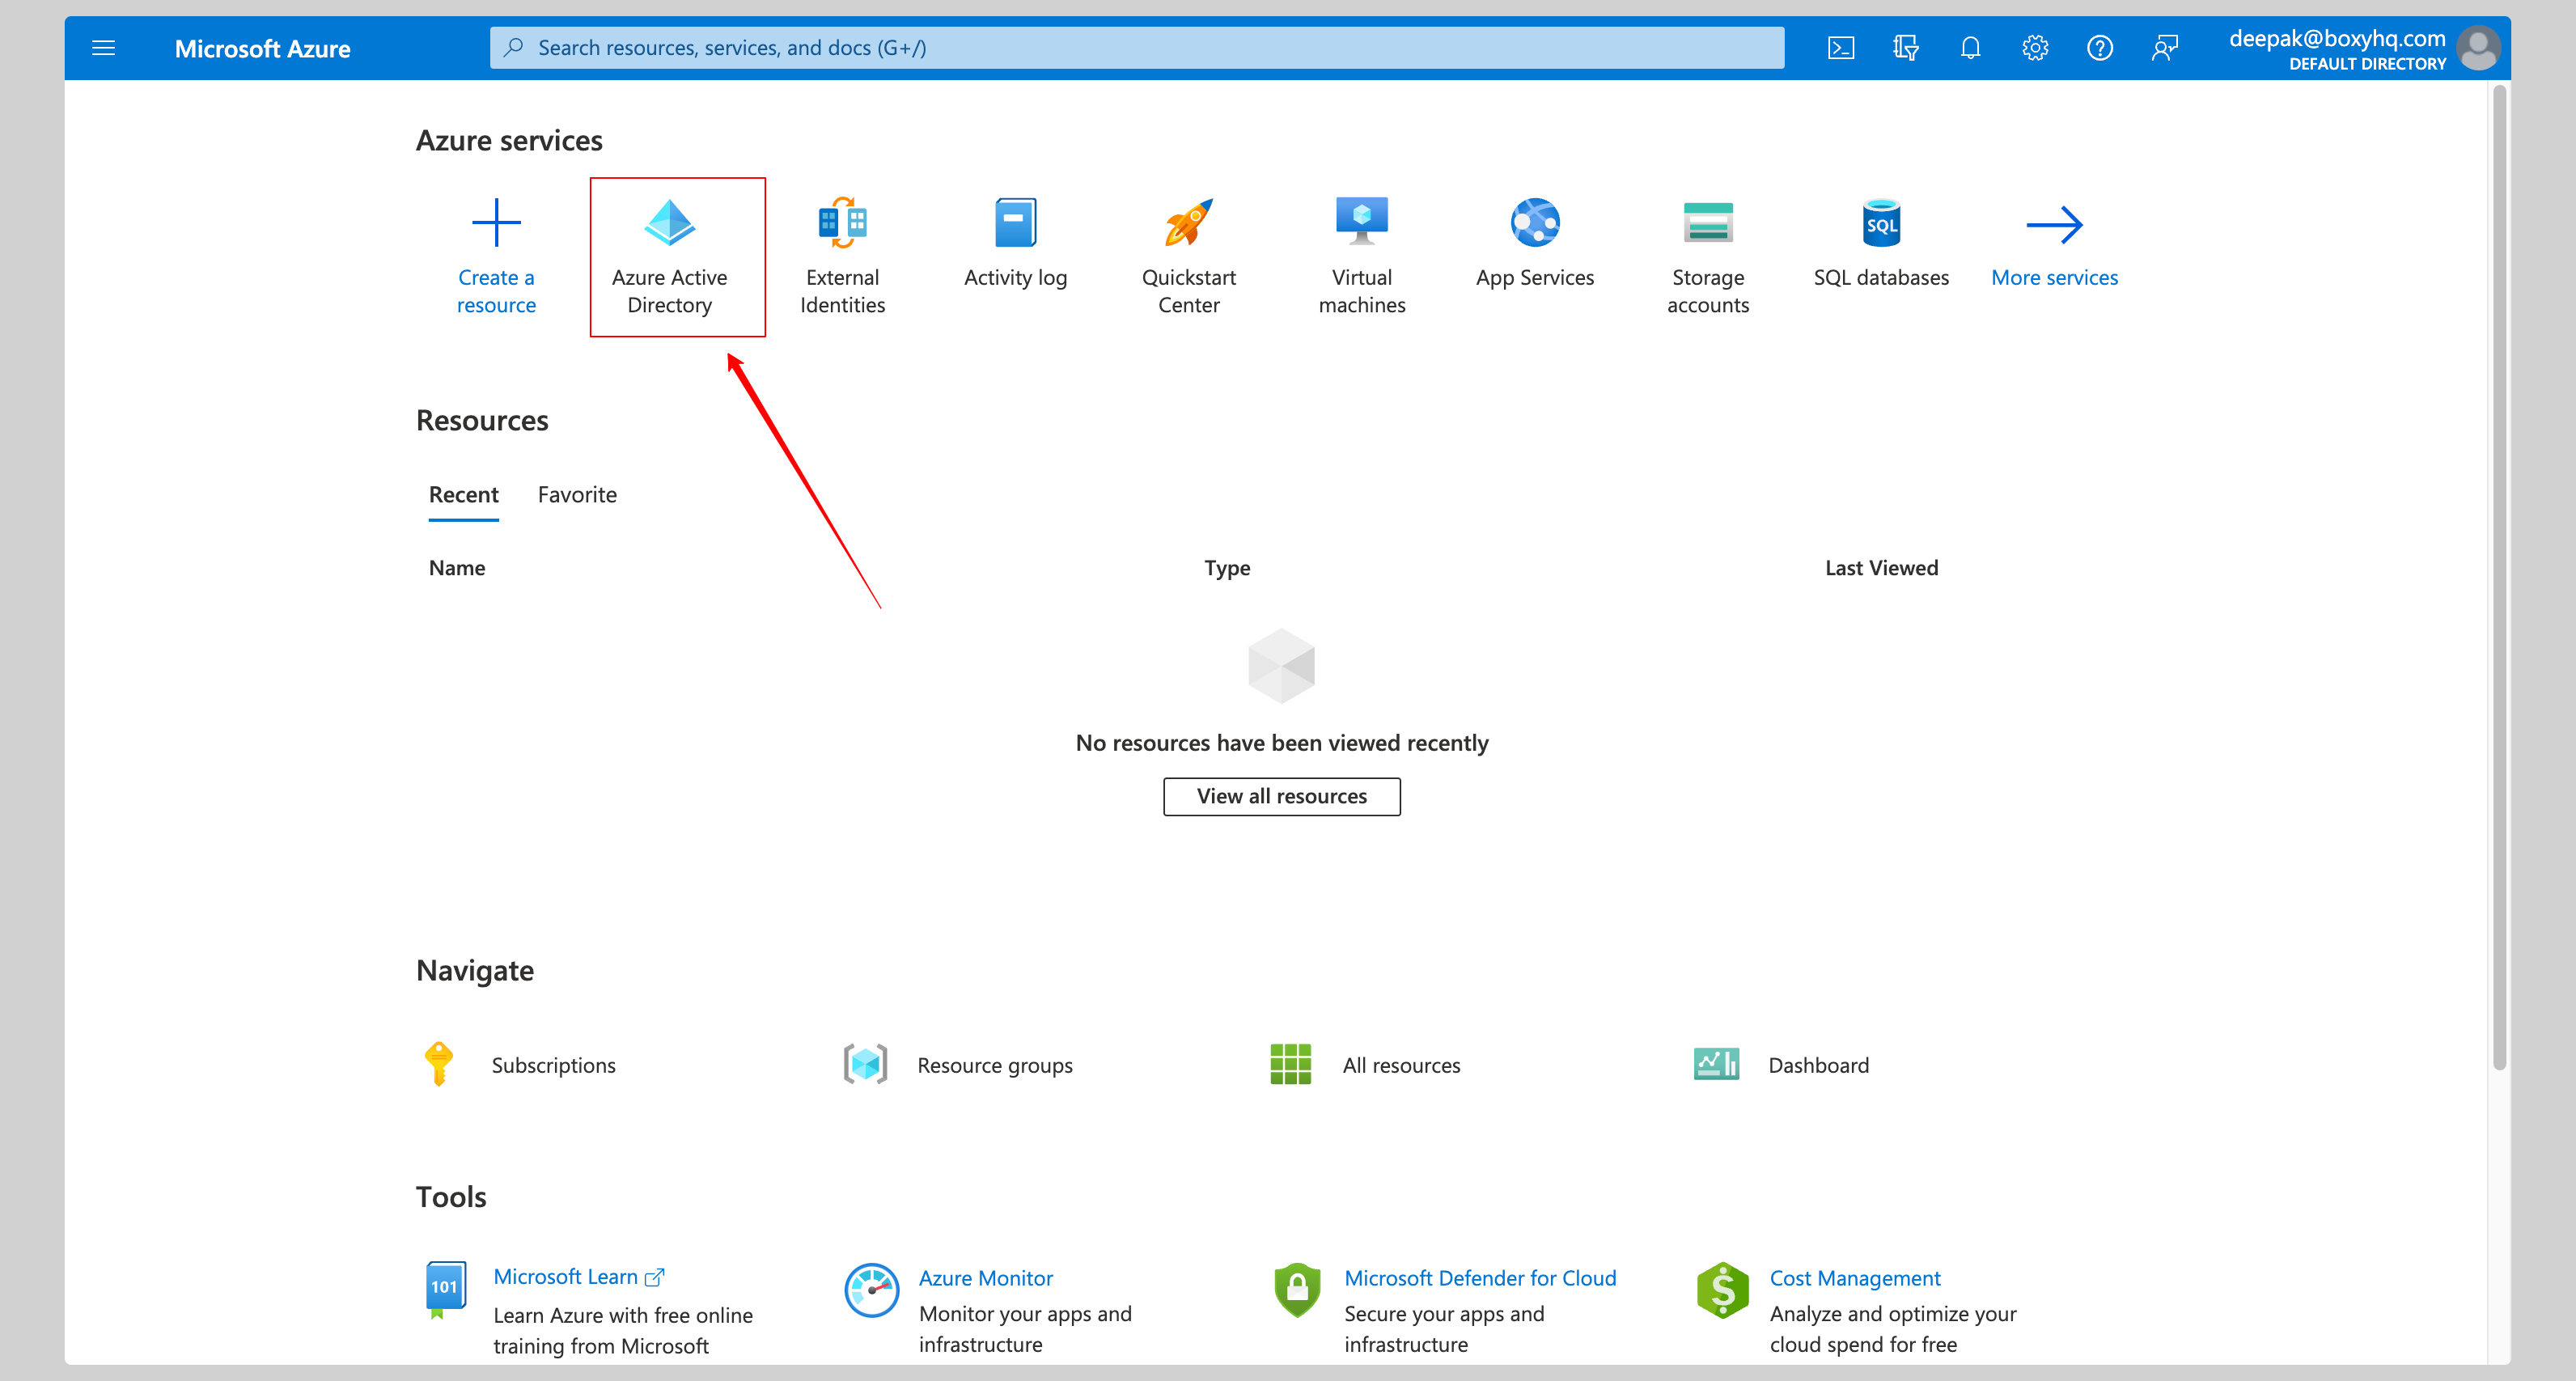
Click Azure Active Directory from the Microsoft Azure Portal.
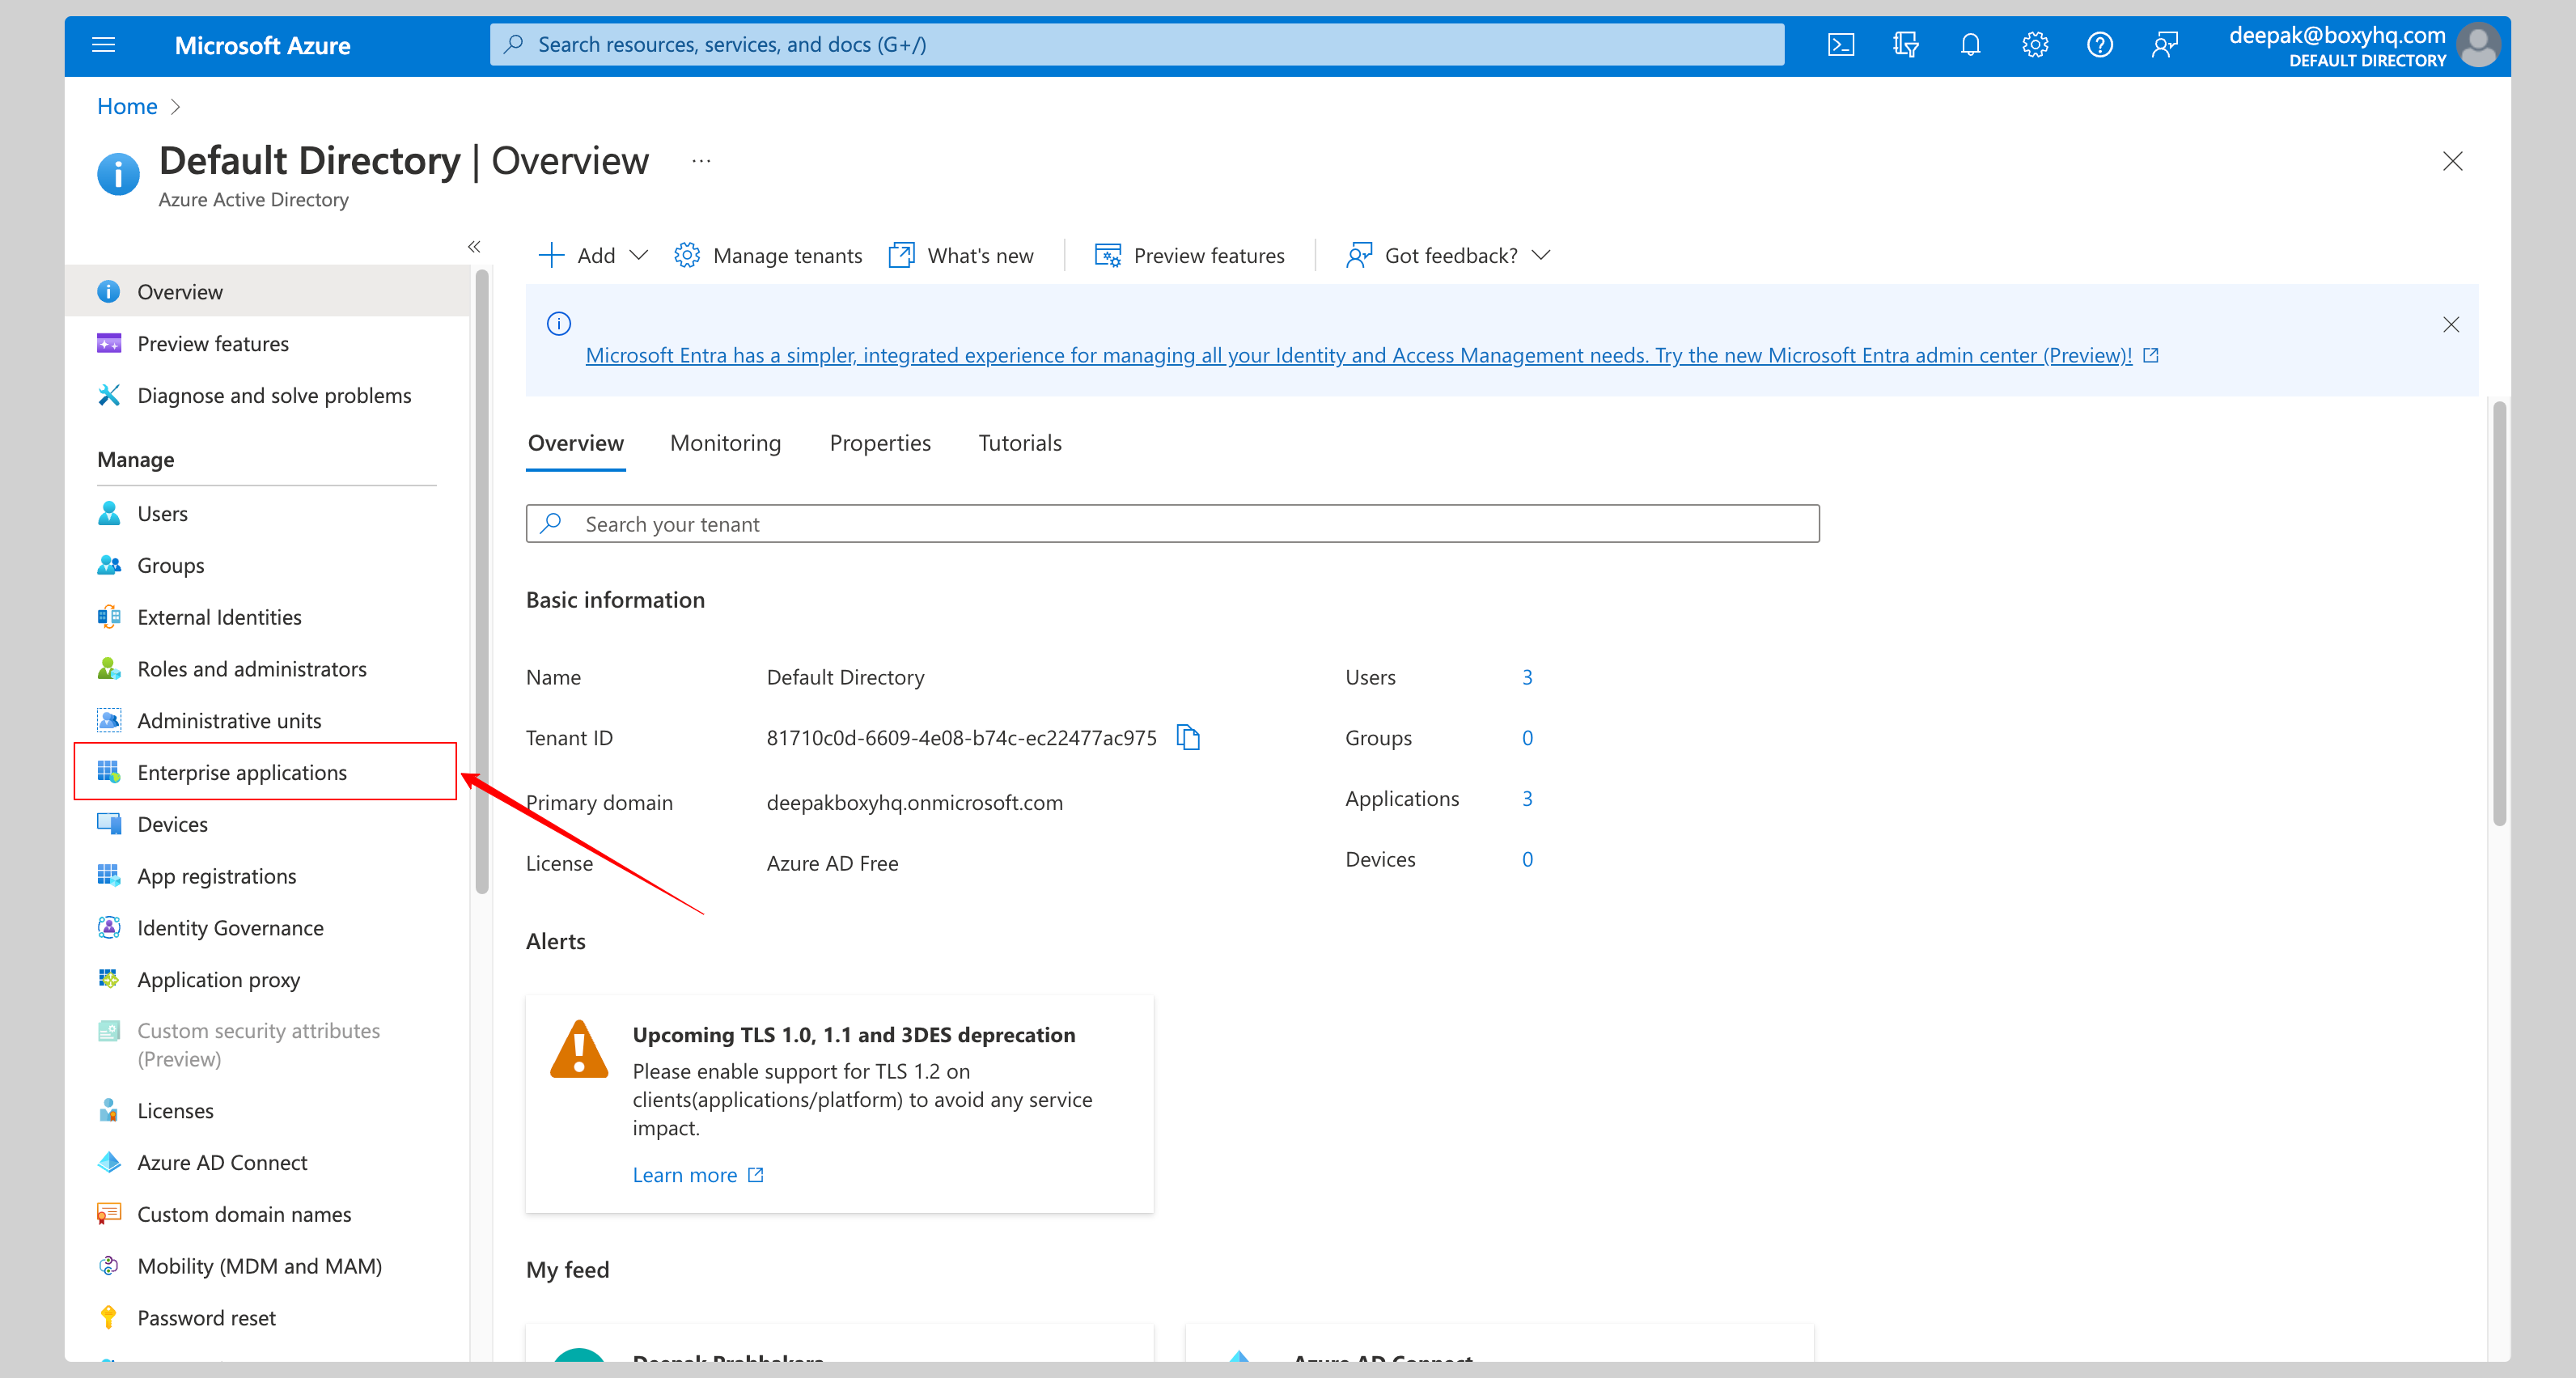
Click Enterprise Applications from the left navigation menu.
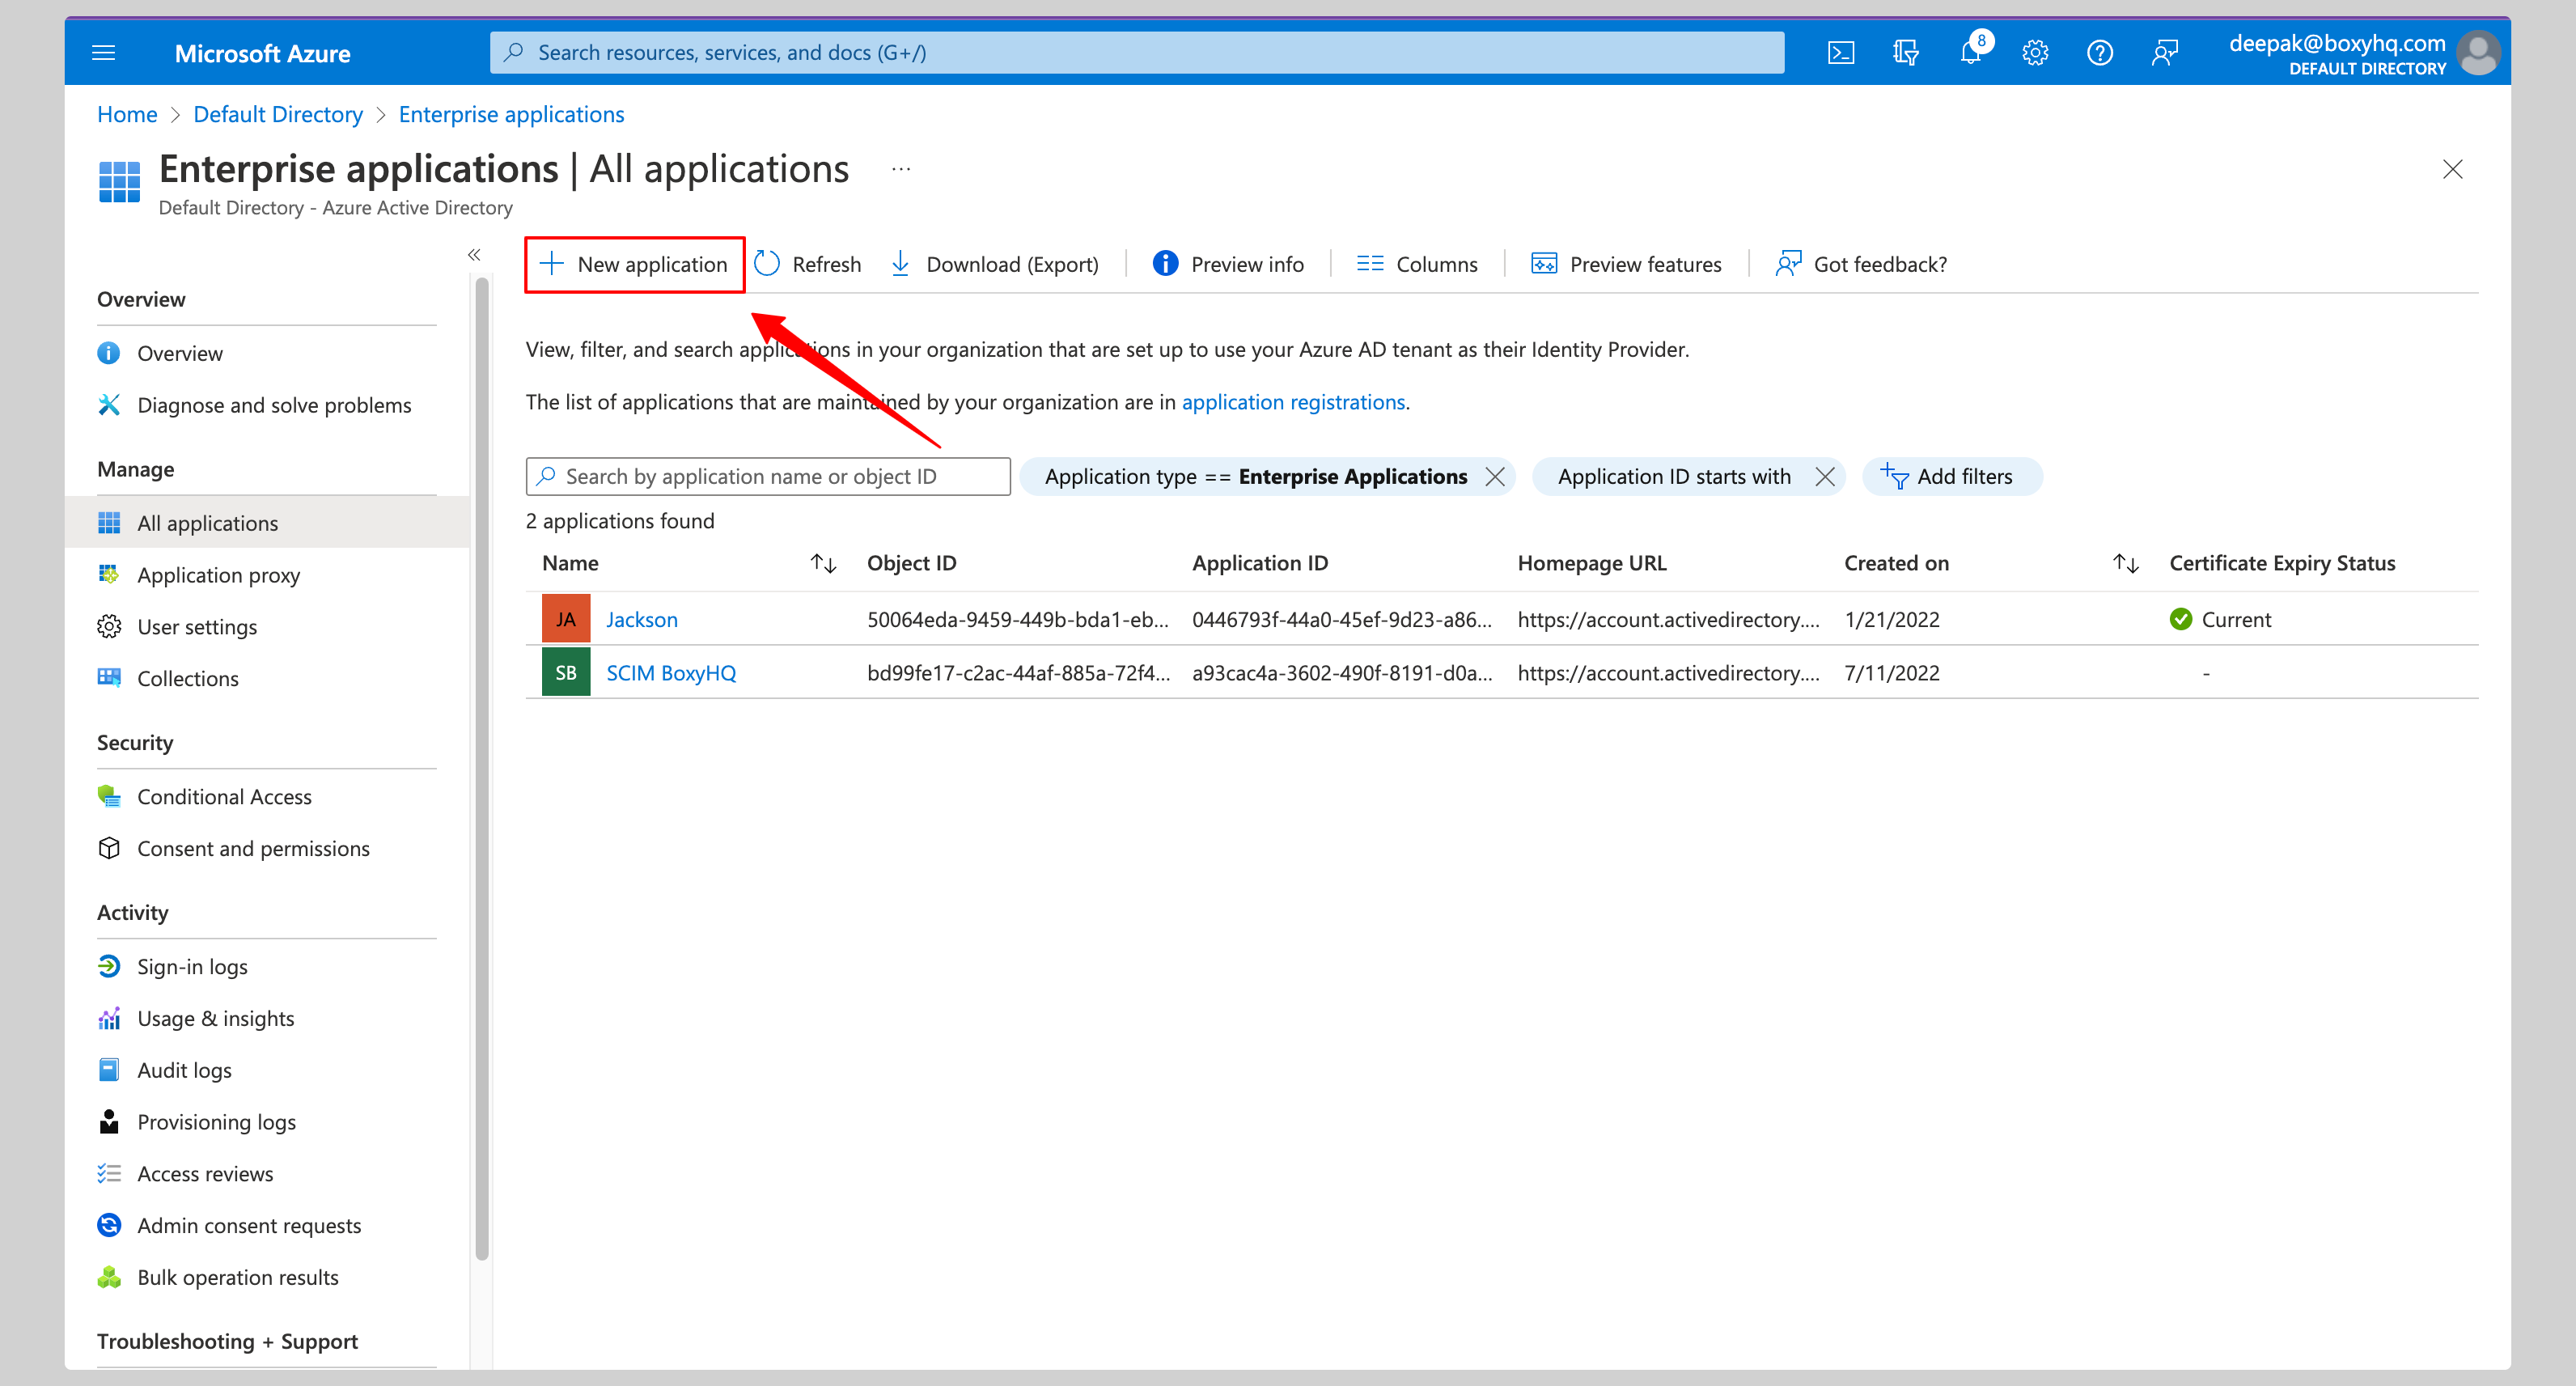
If your application is already created, choose it from the list and move to the section Enable SCIM Provisioning
If you haven't created your application yet, click New application button.
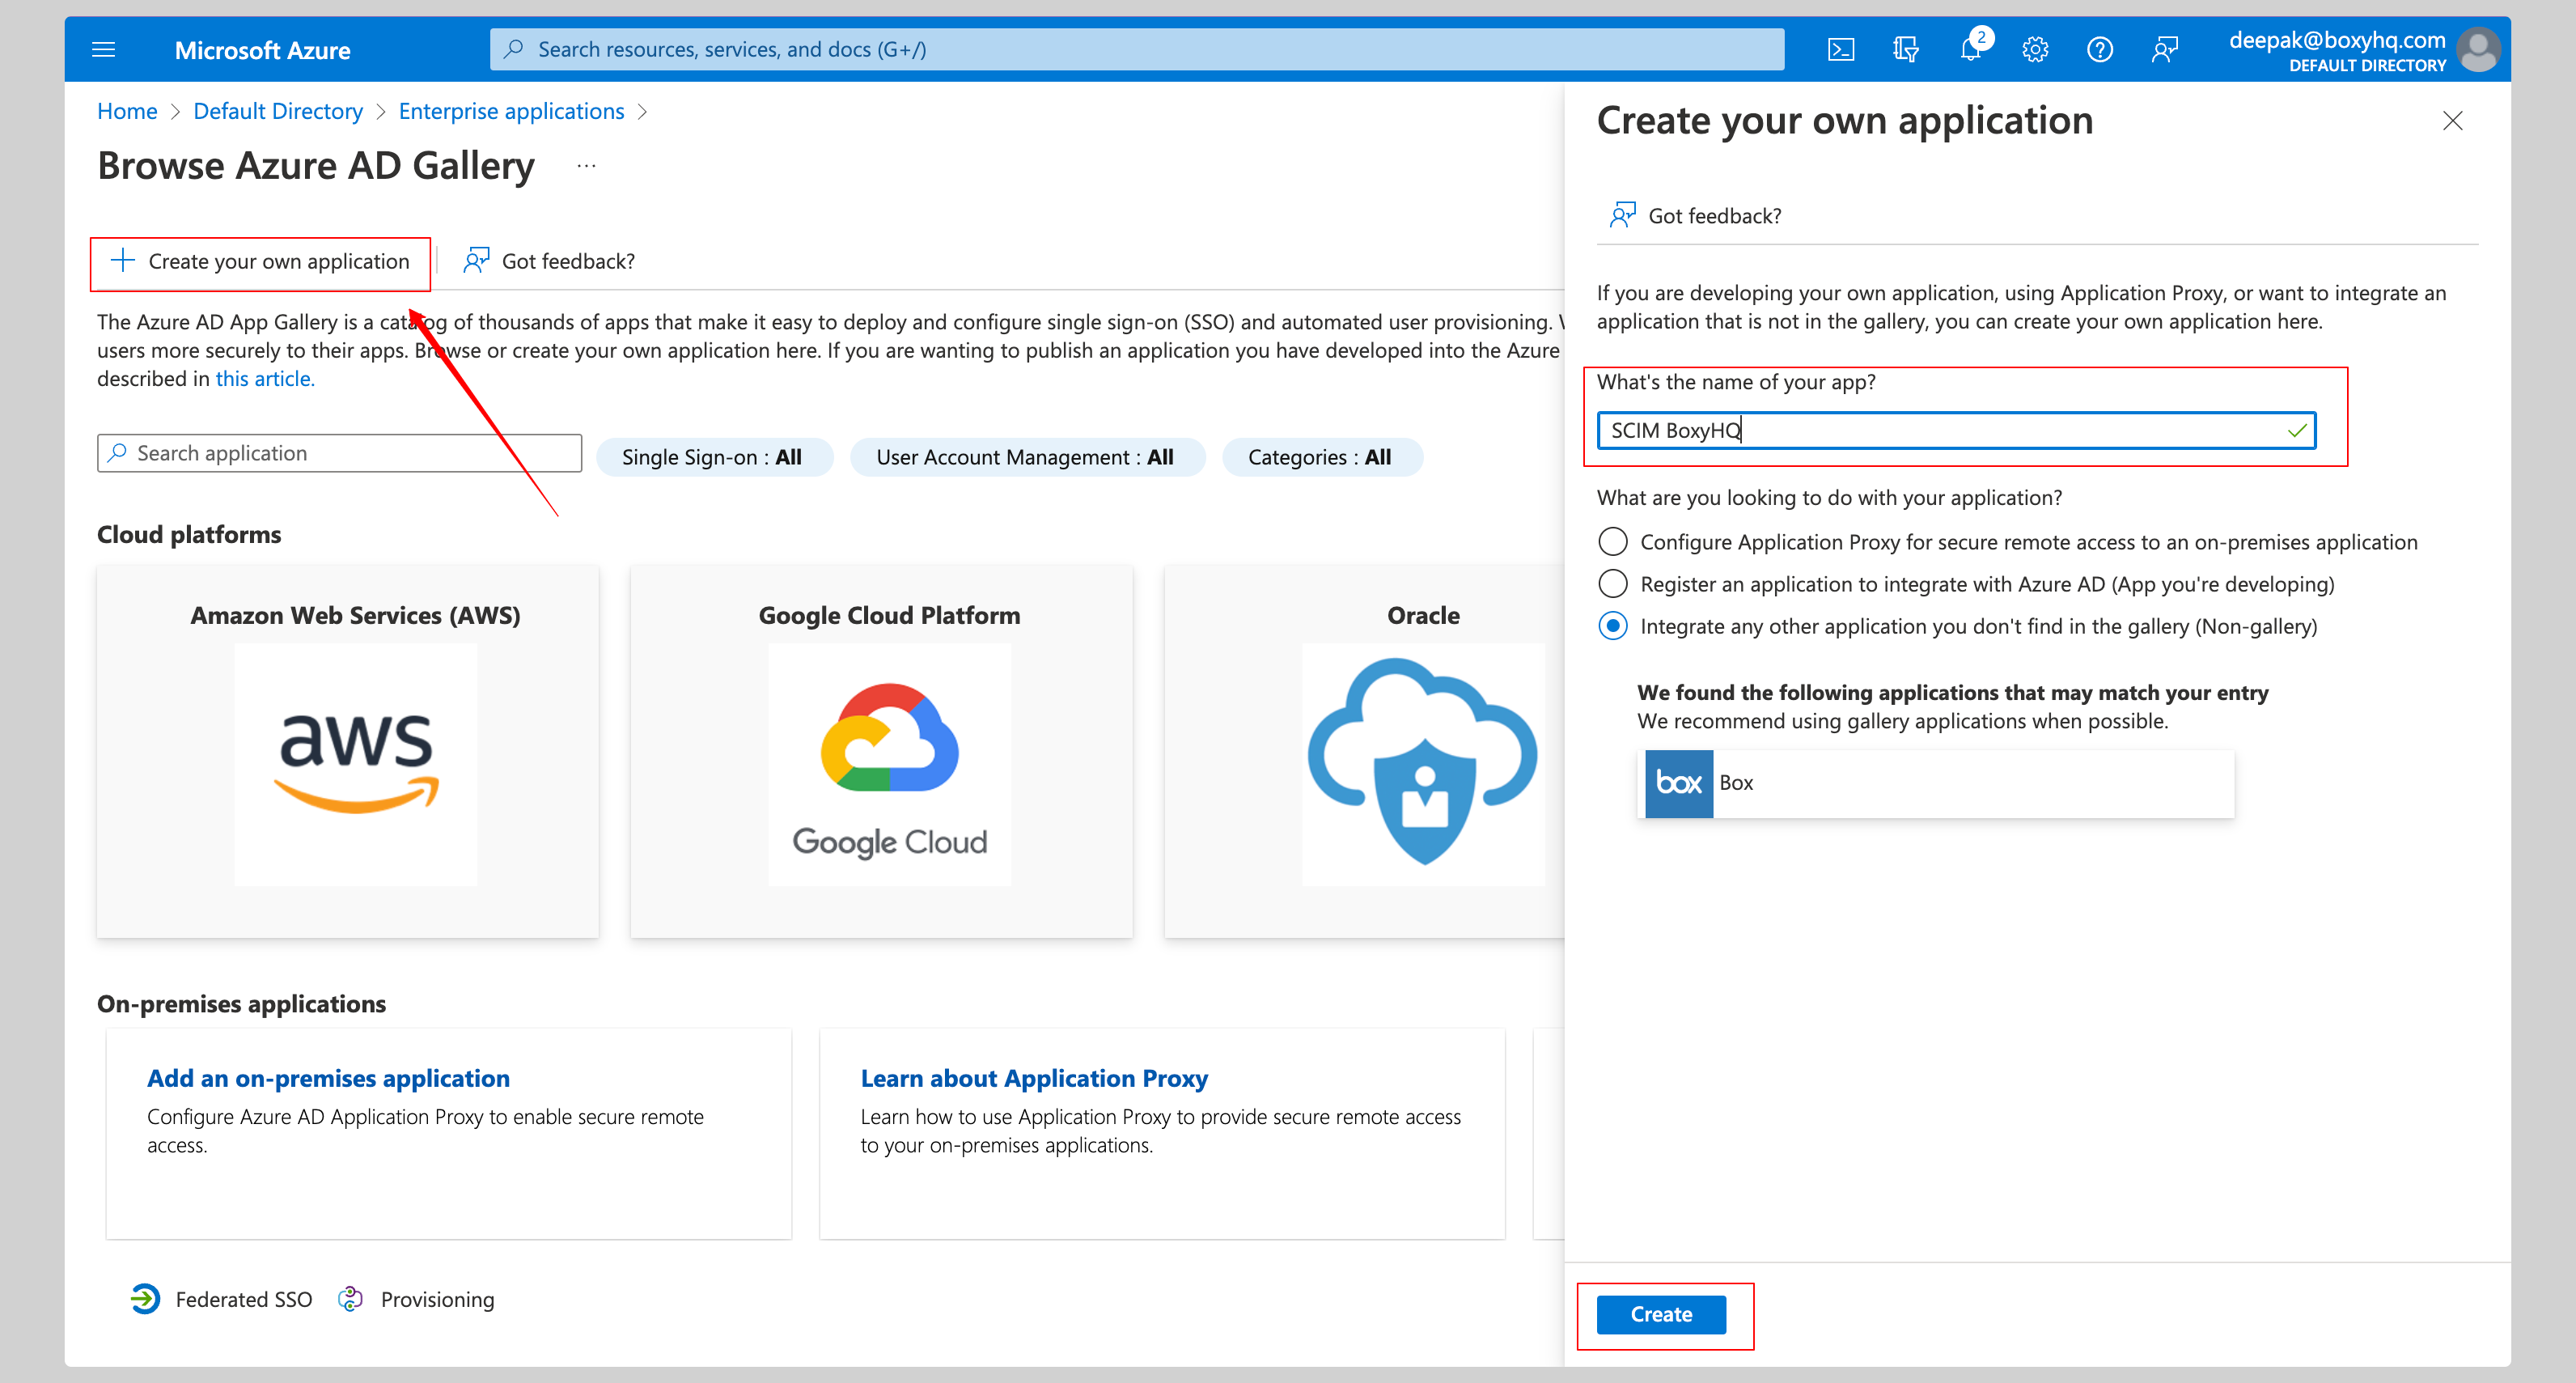
From the next screen, click Create your own application, give your application a name and click the Create button.
Enable Azure SCIM Provisioning
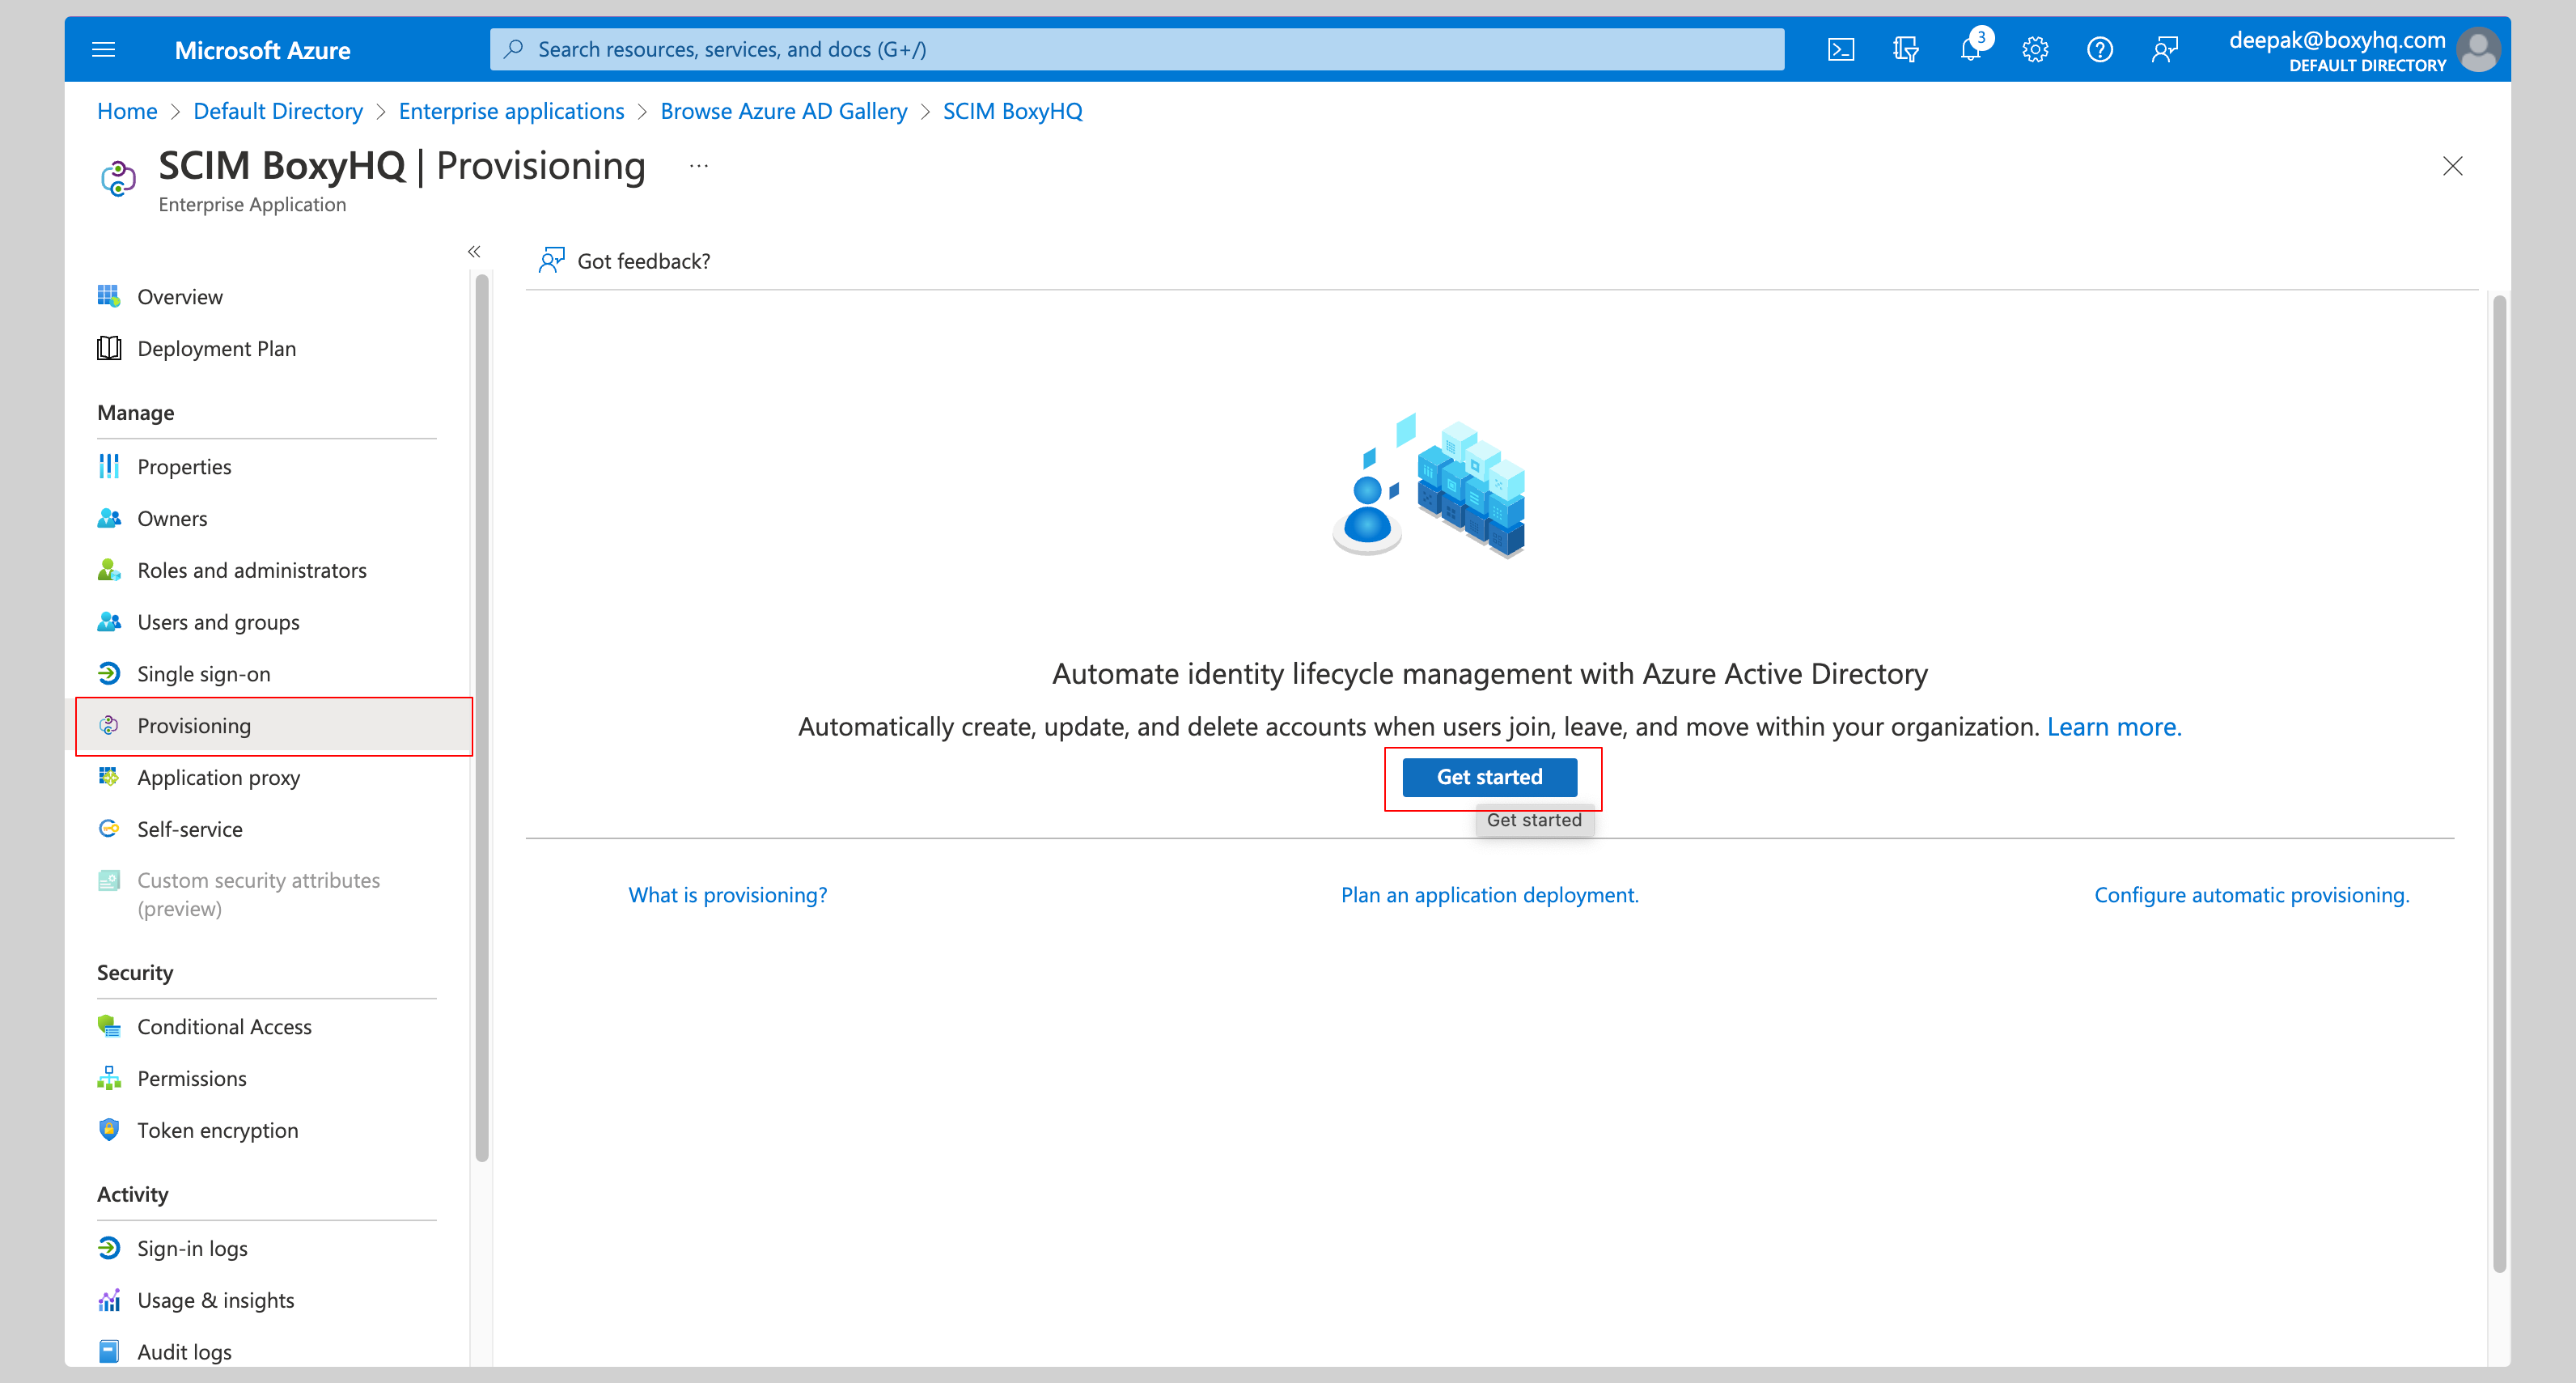
Click Provisioning from the left navigation menu then click Get started.
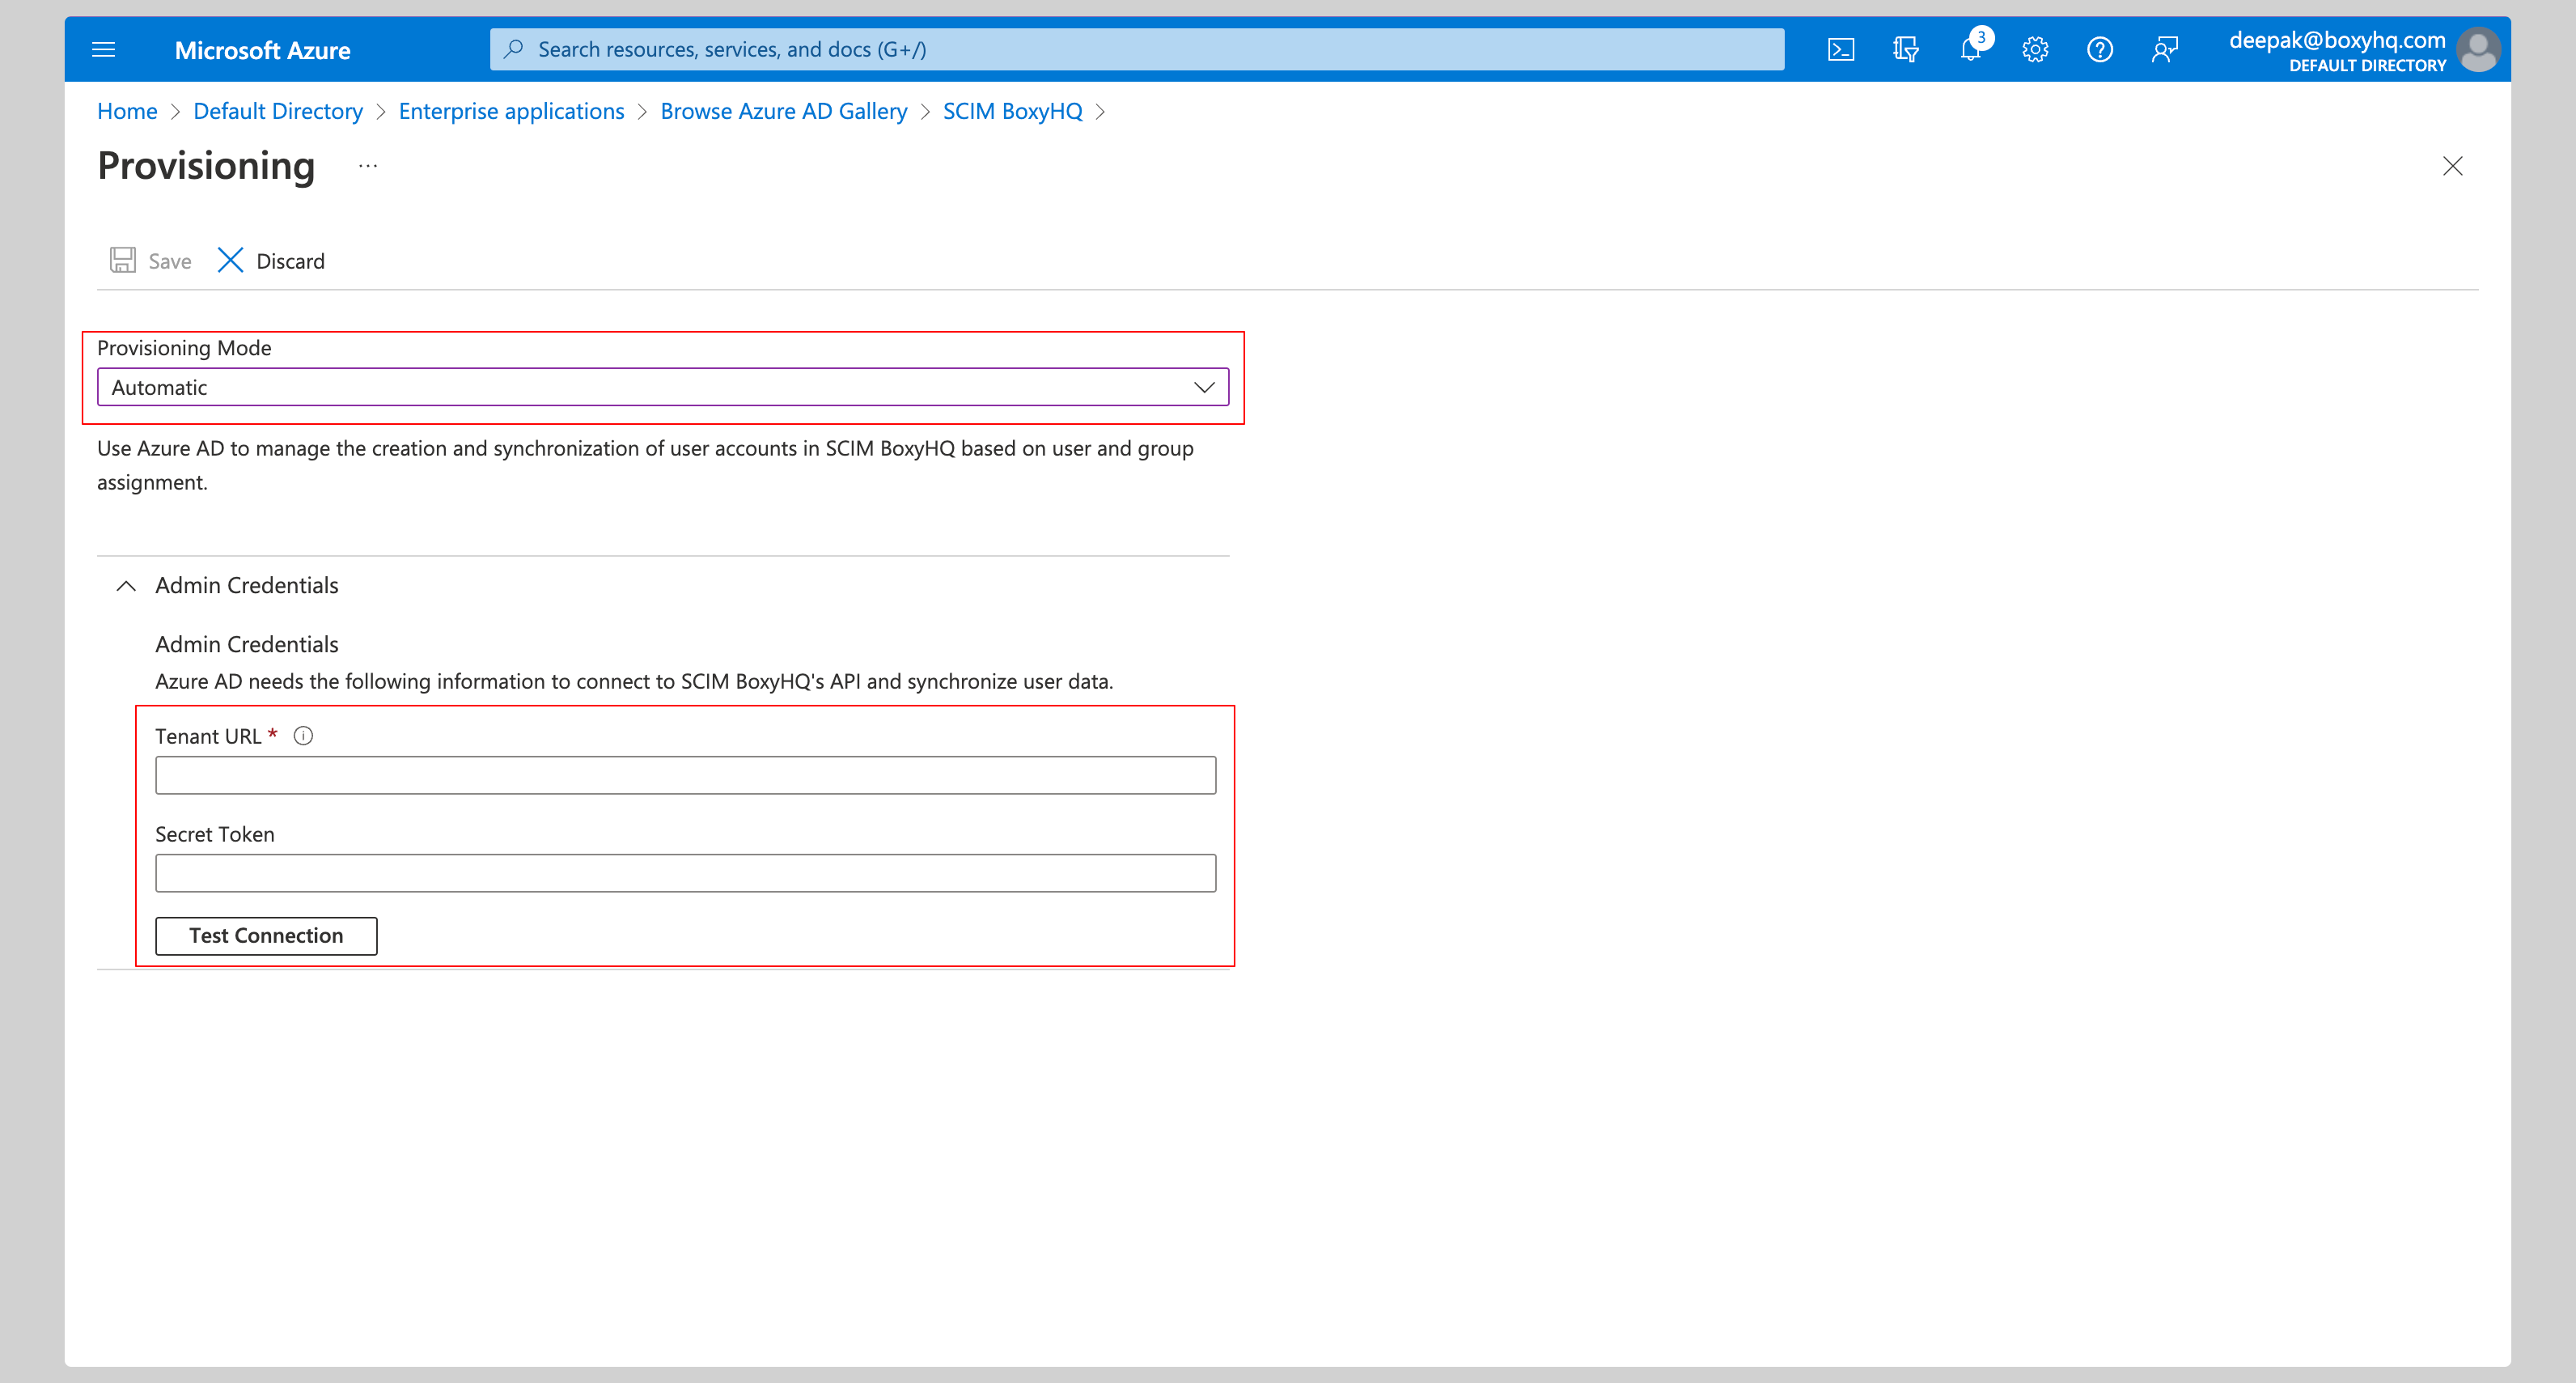
Select Automatic from the Provisioning Mode dropdown and enter the following information under Admin Credentials section:
- Tenant URL
- Secret Token
Next, click the Test Connection button to test the connection to see if the credentials are correct, then click Save to save the credentials.
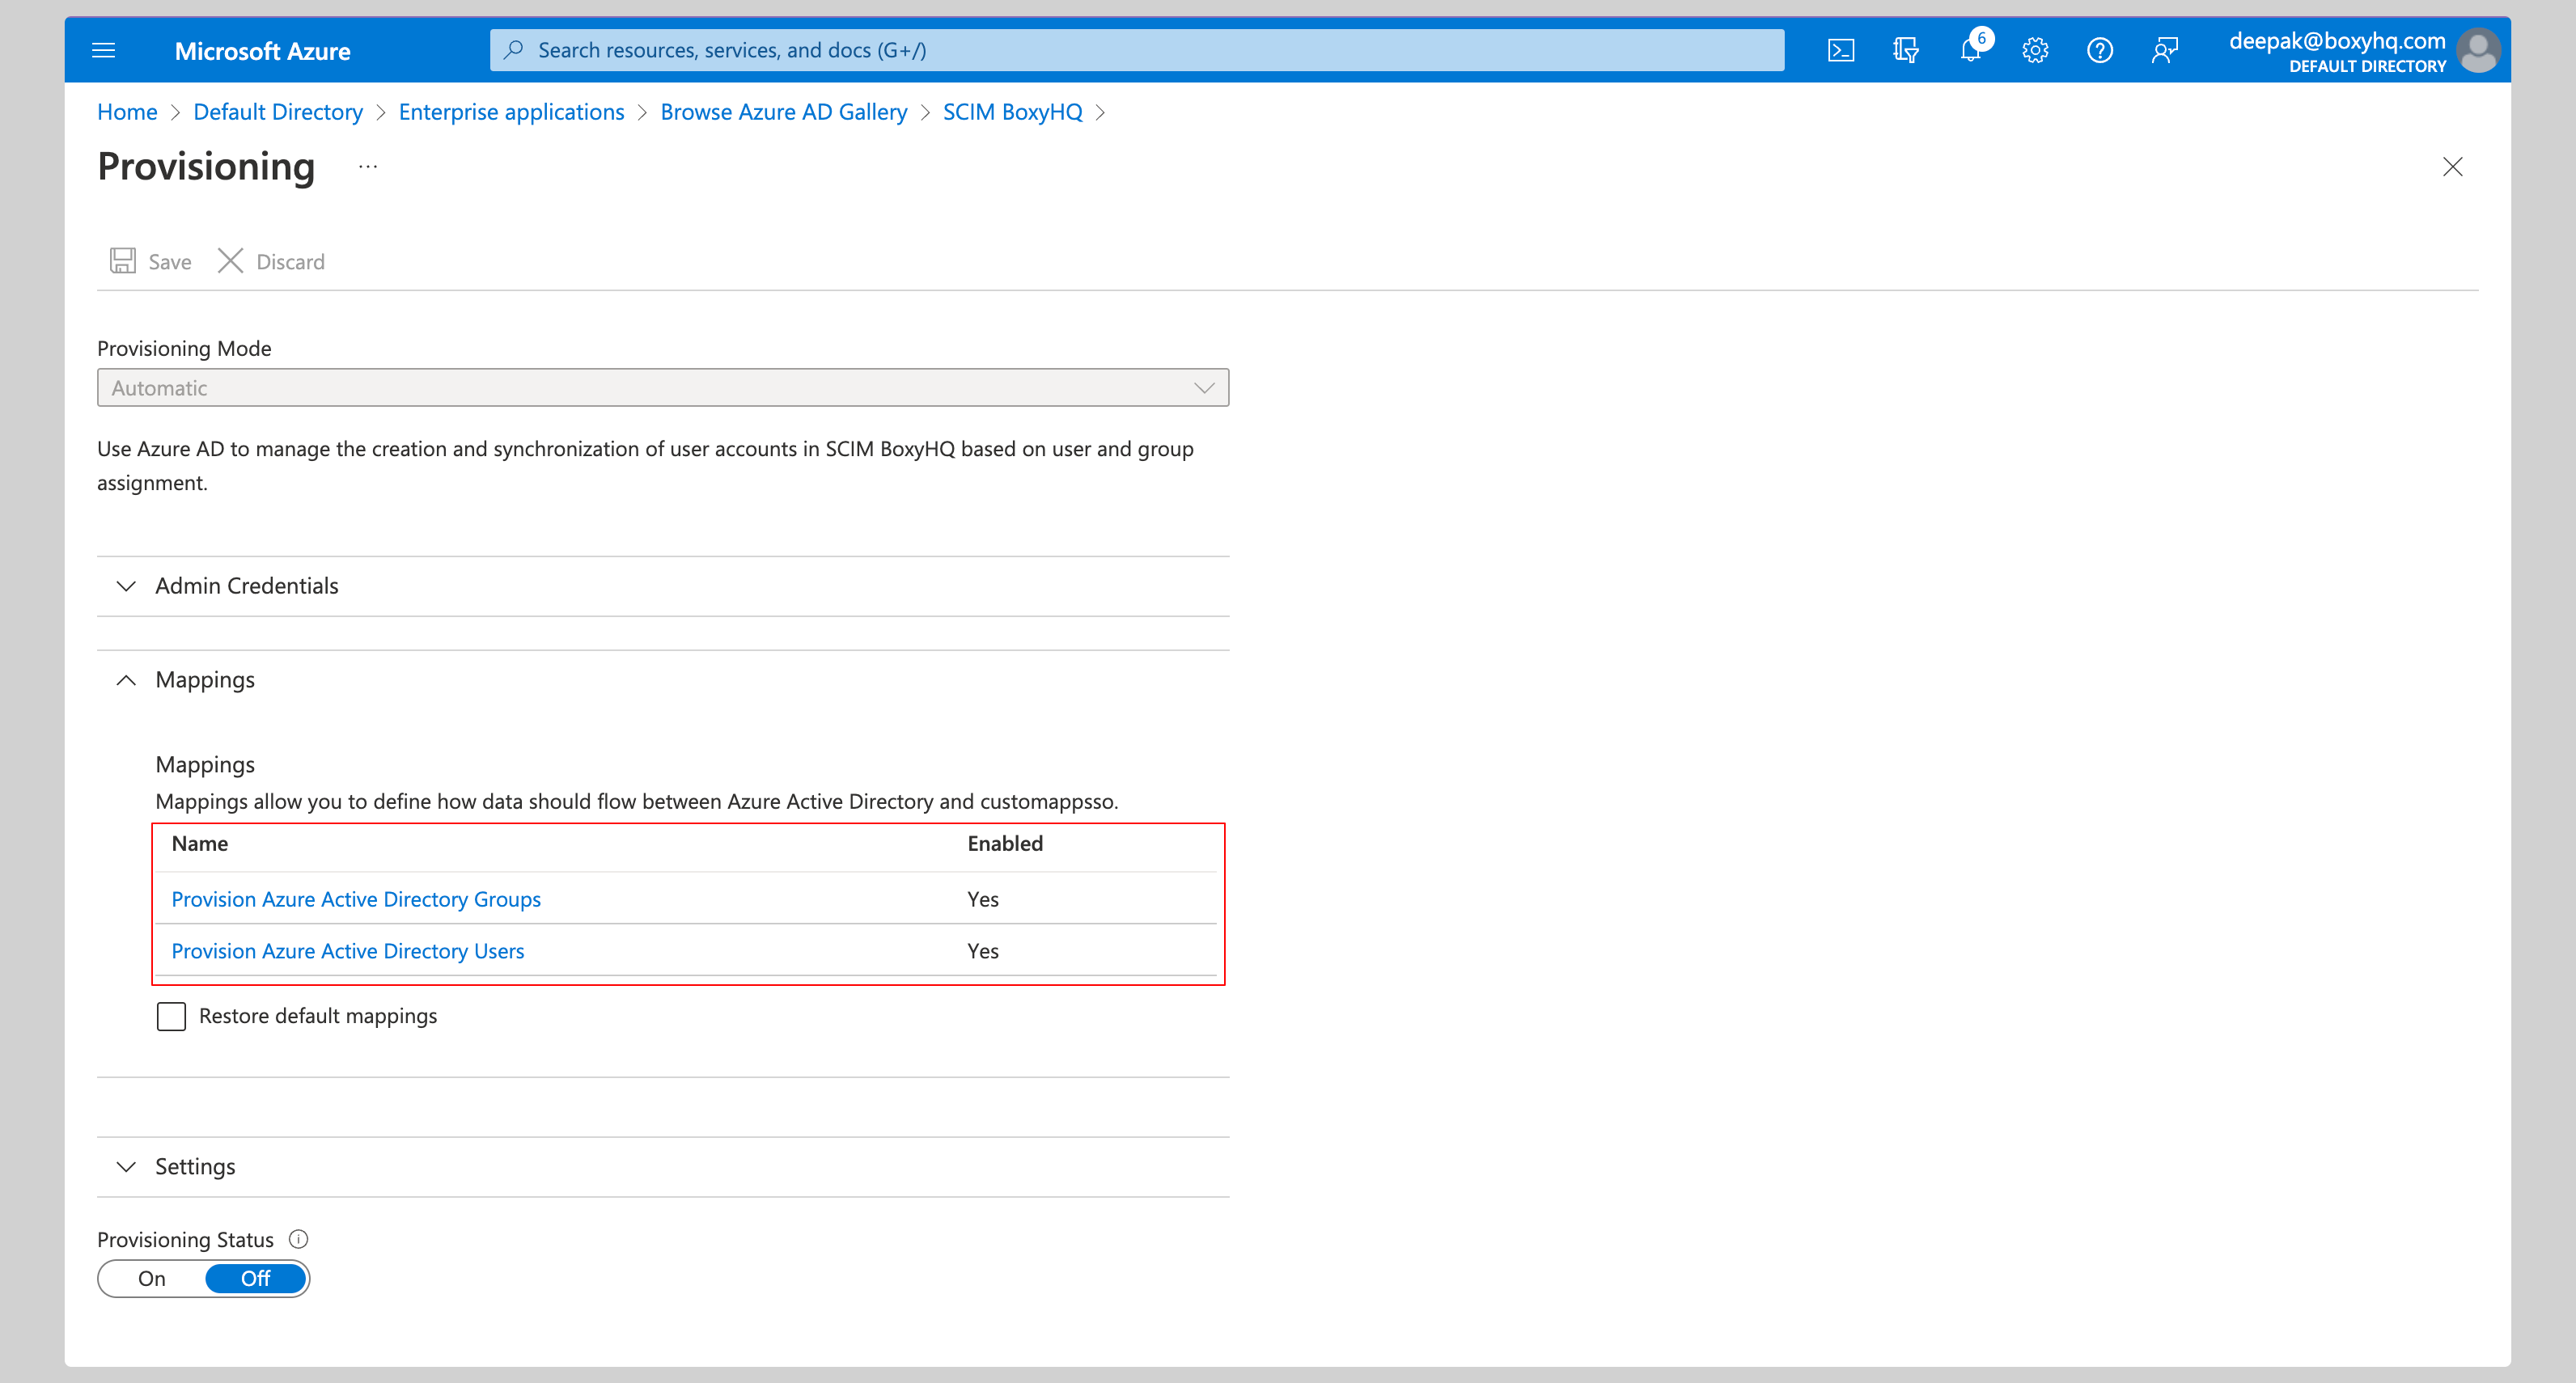
Expand the Mappings section and ensure group and user attribute mappings are enabled for your app. The default mapping should work.
Expand the Settings section and make the following changes:
- Select Sync only assigned users and groups from the Scope dropdown.
- Confirm the Provisioning Status is set to On.
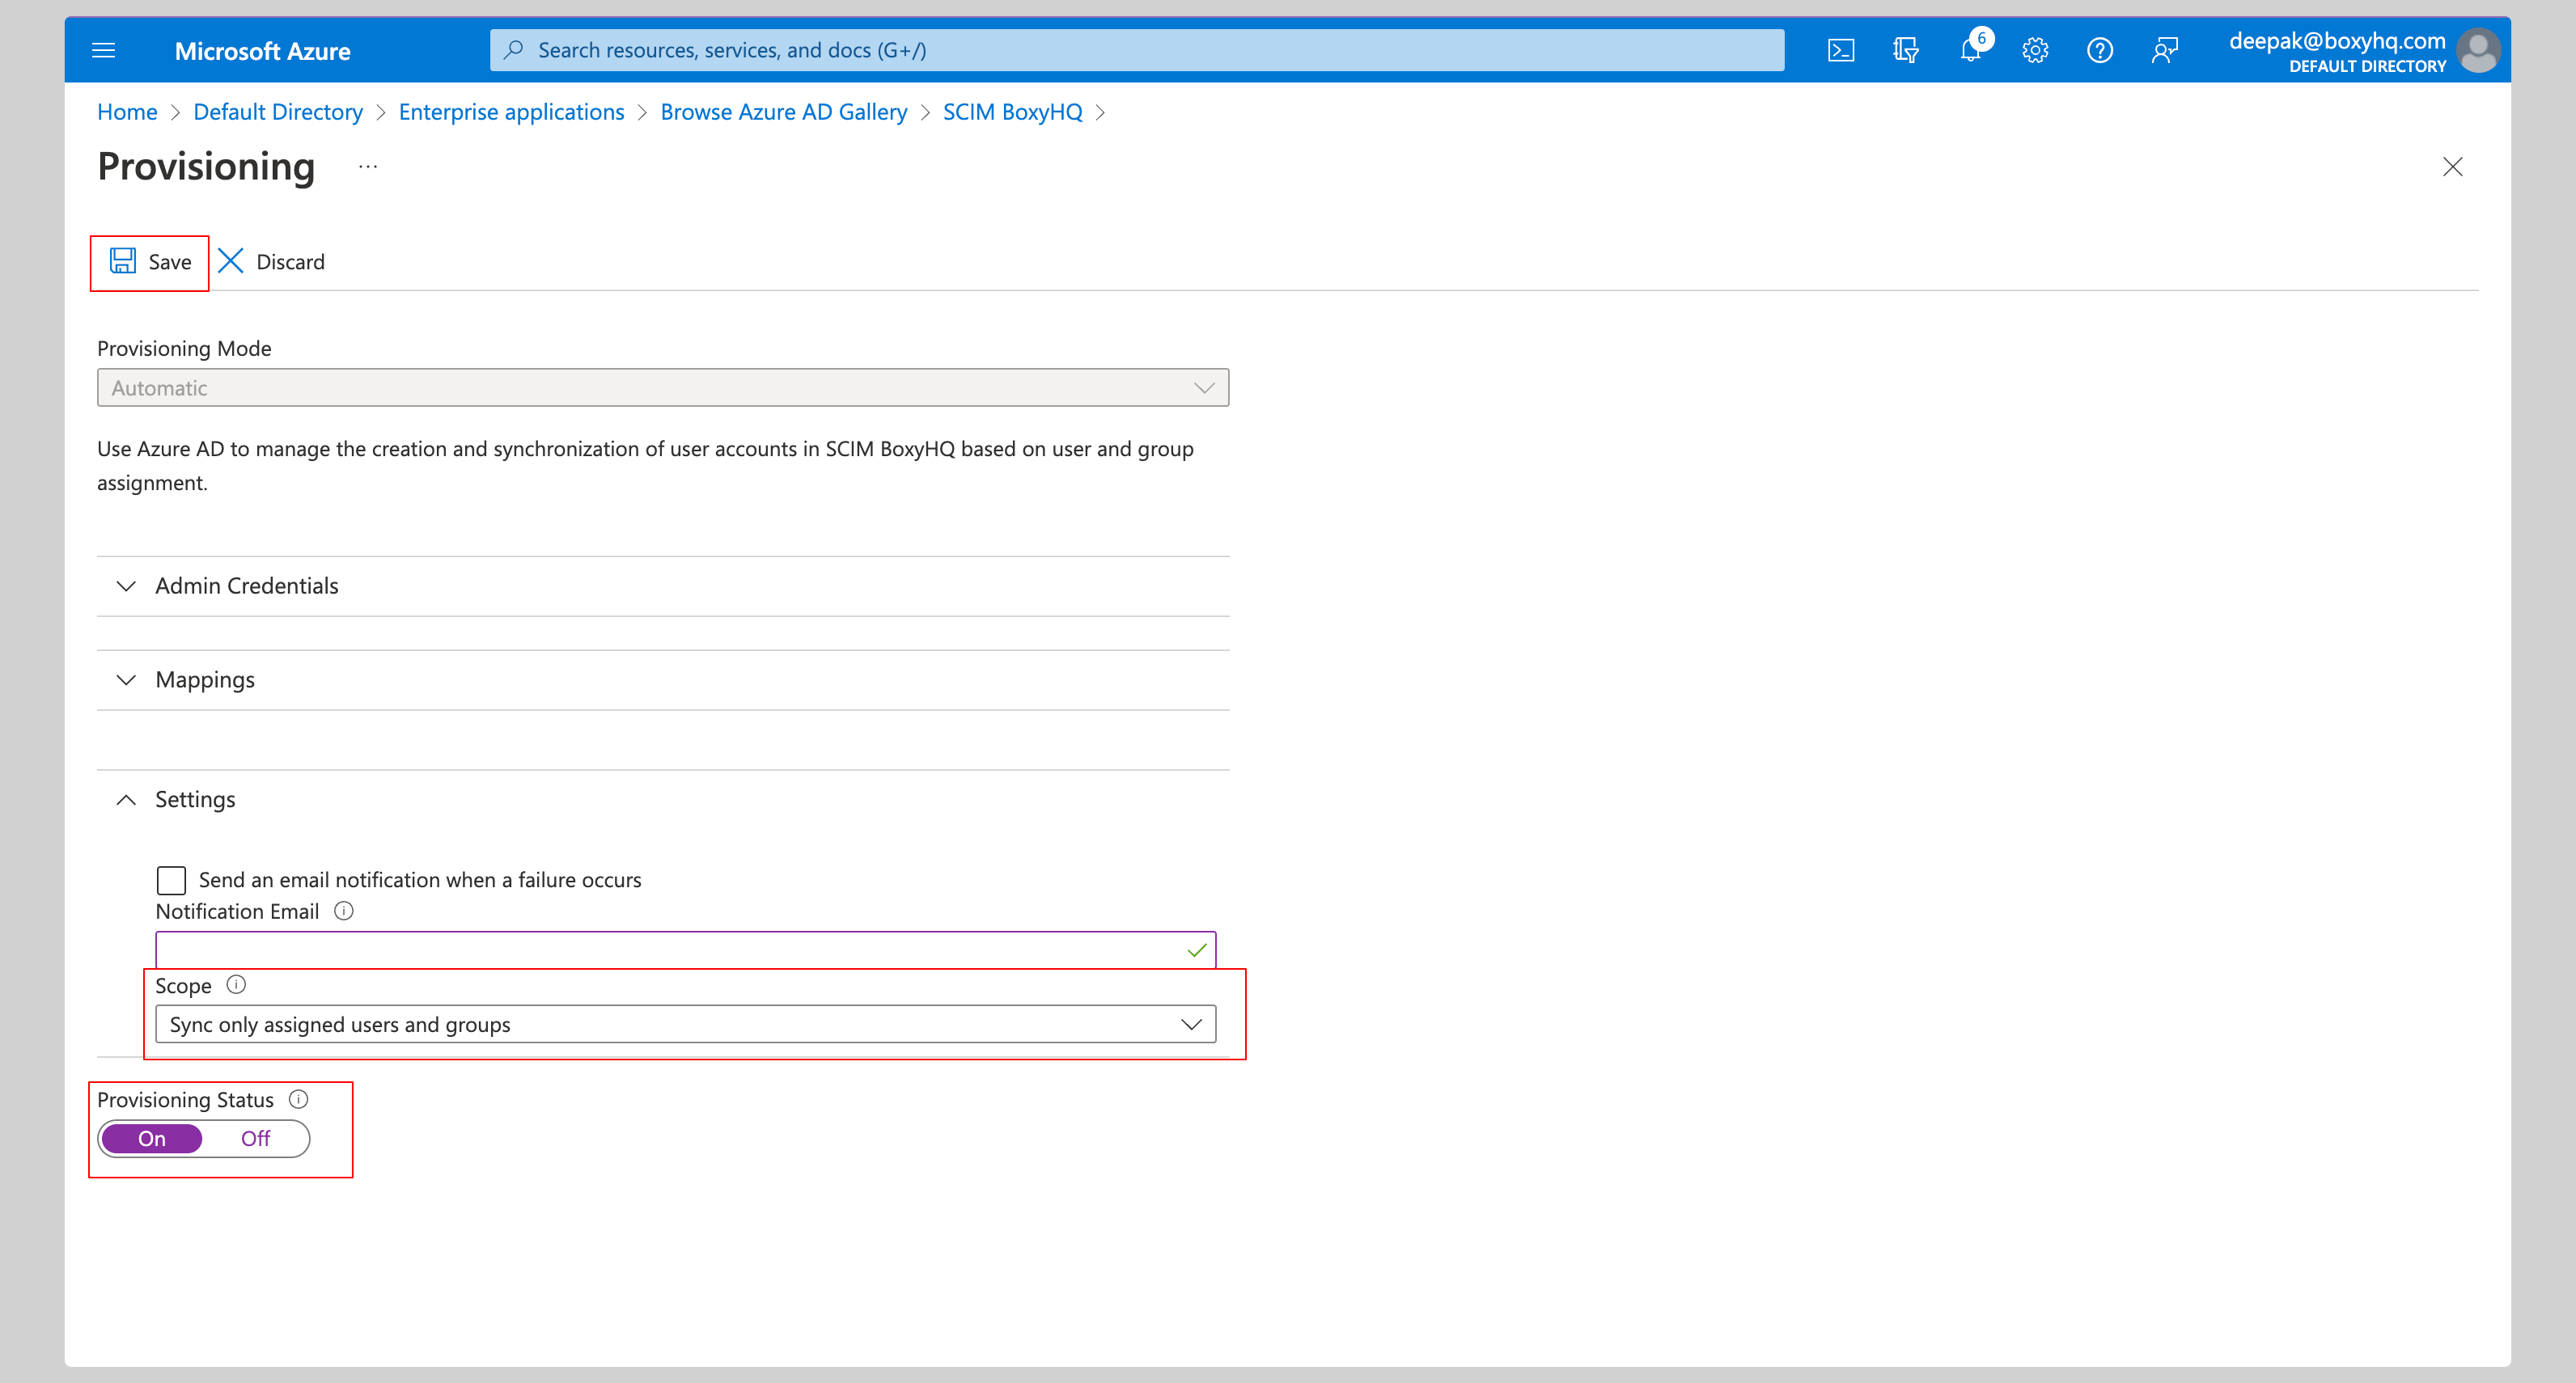
At this stage, you've successfully configured the Microsoft Entra ID SCIM API integration.
Assign Users
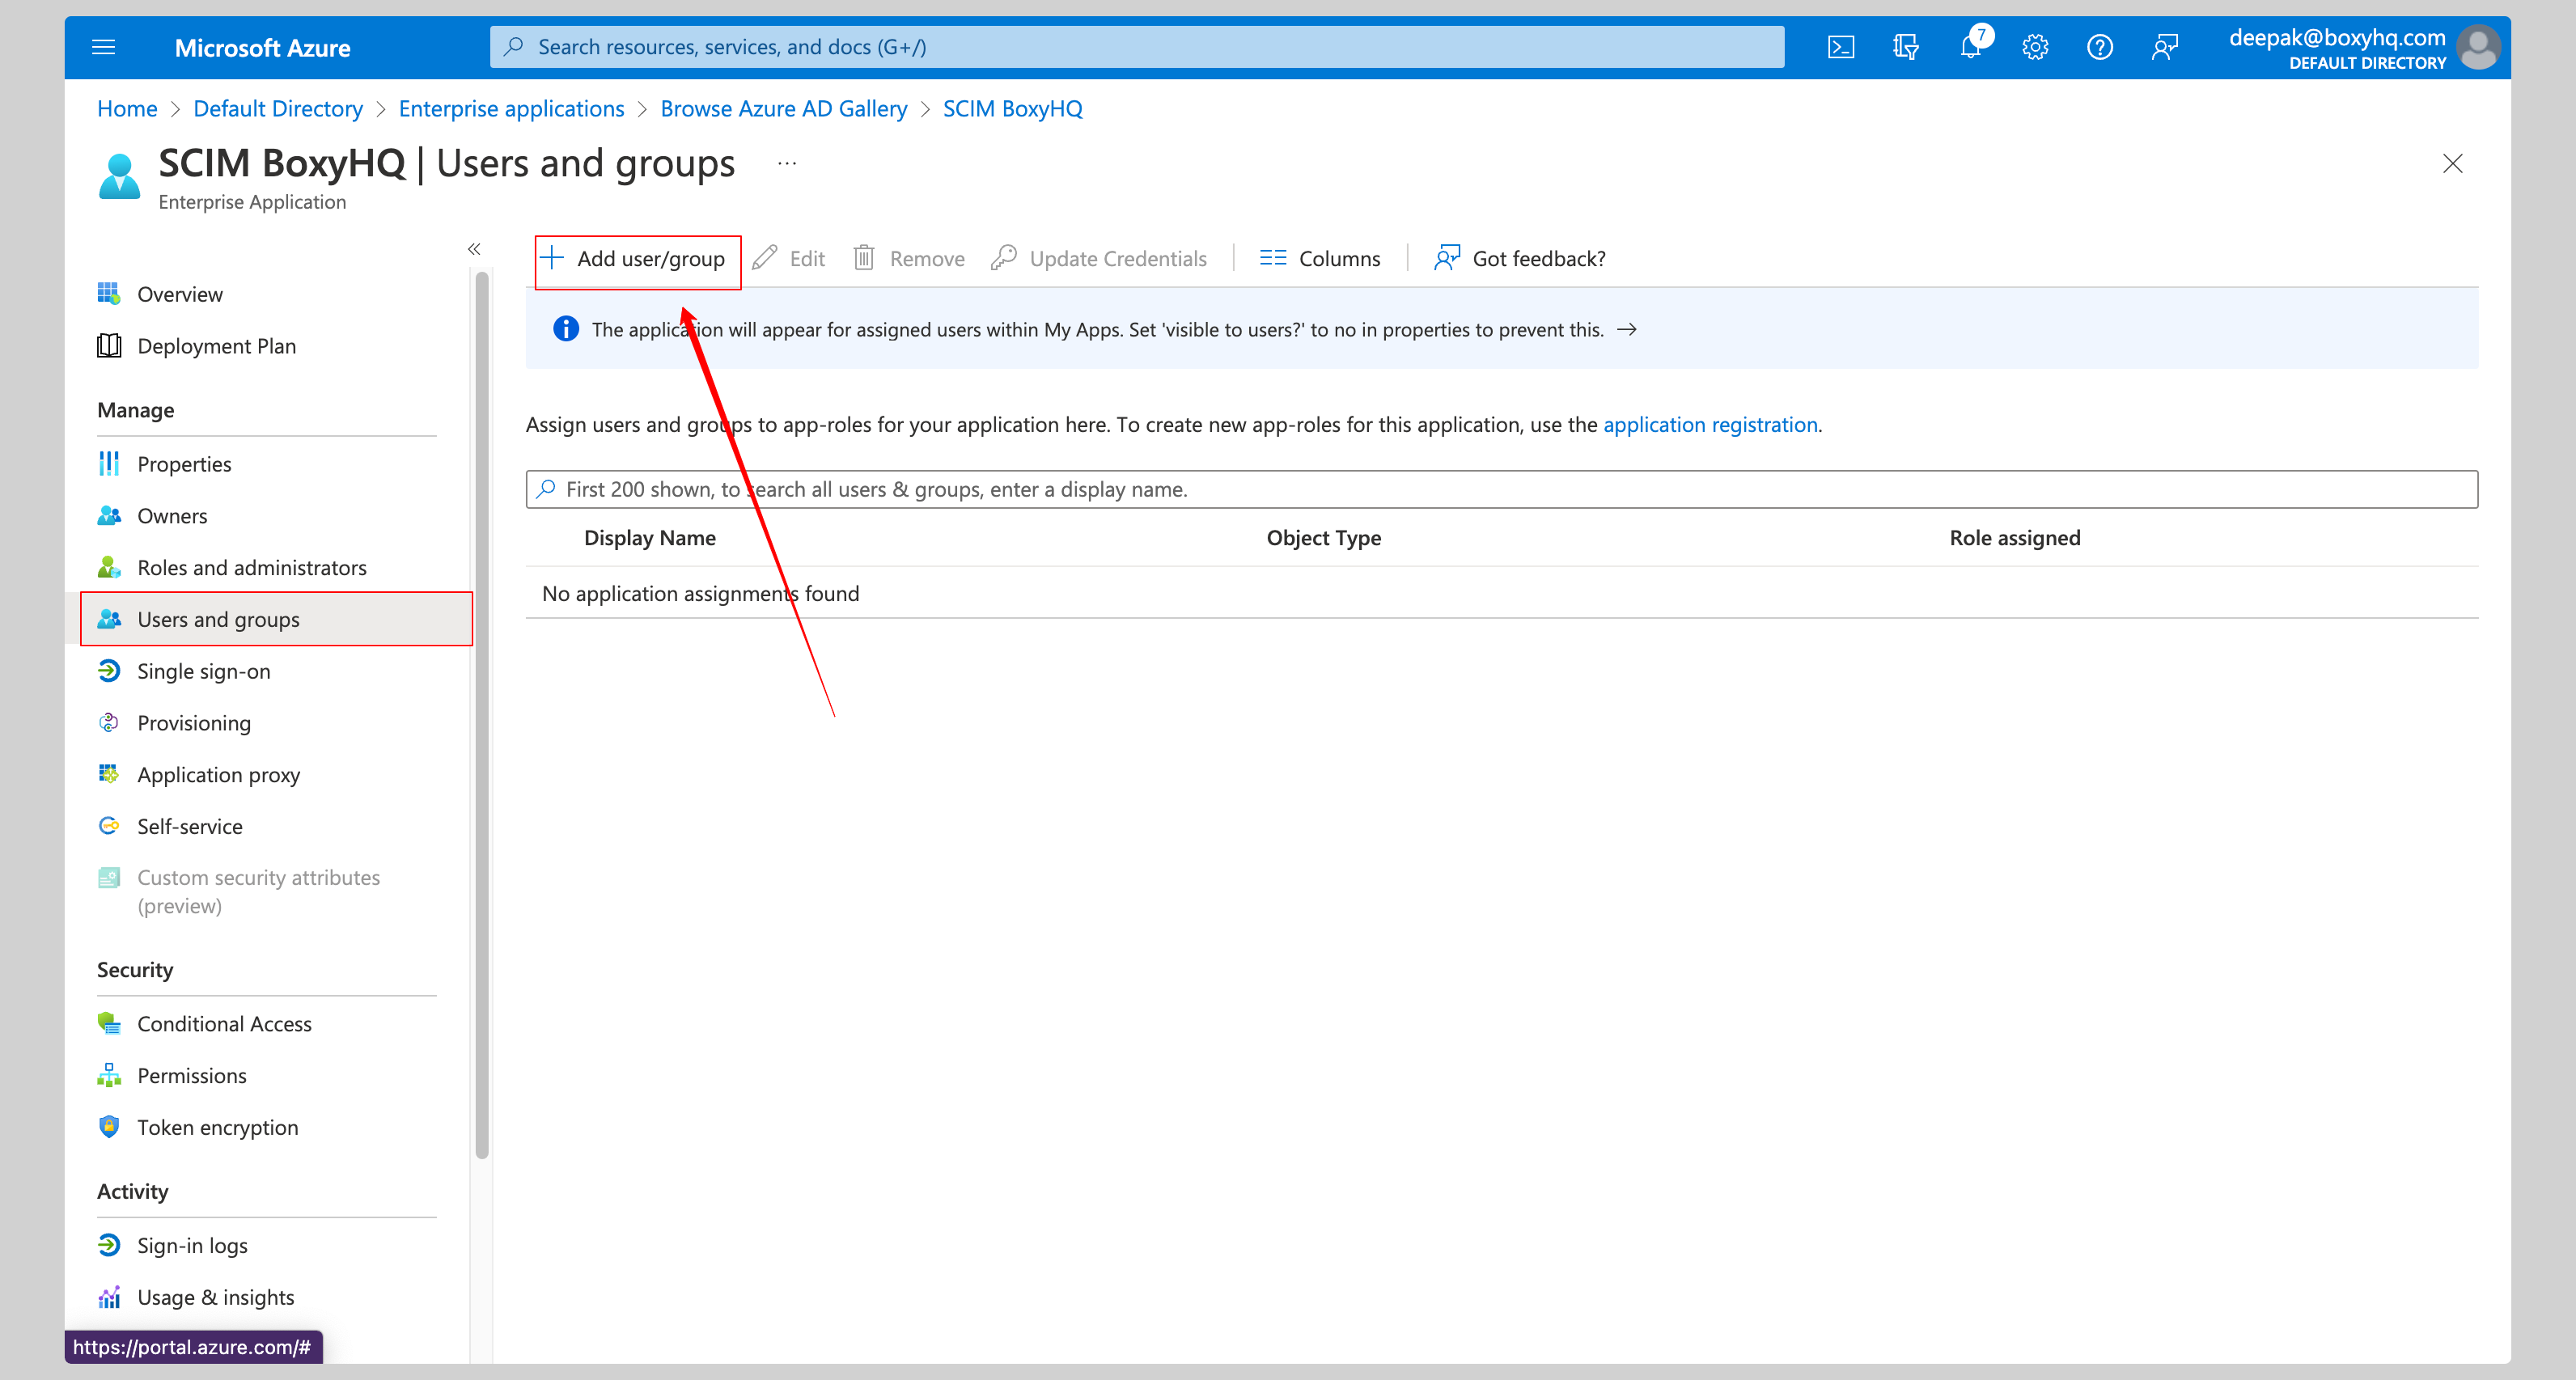
From your application, click the Users and groups from the left navigation menu and click Add user/group.
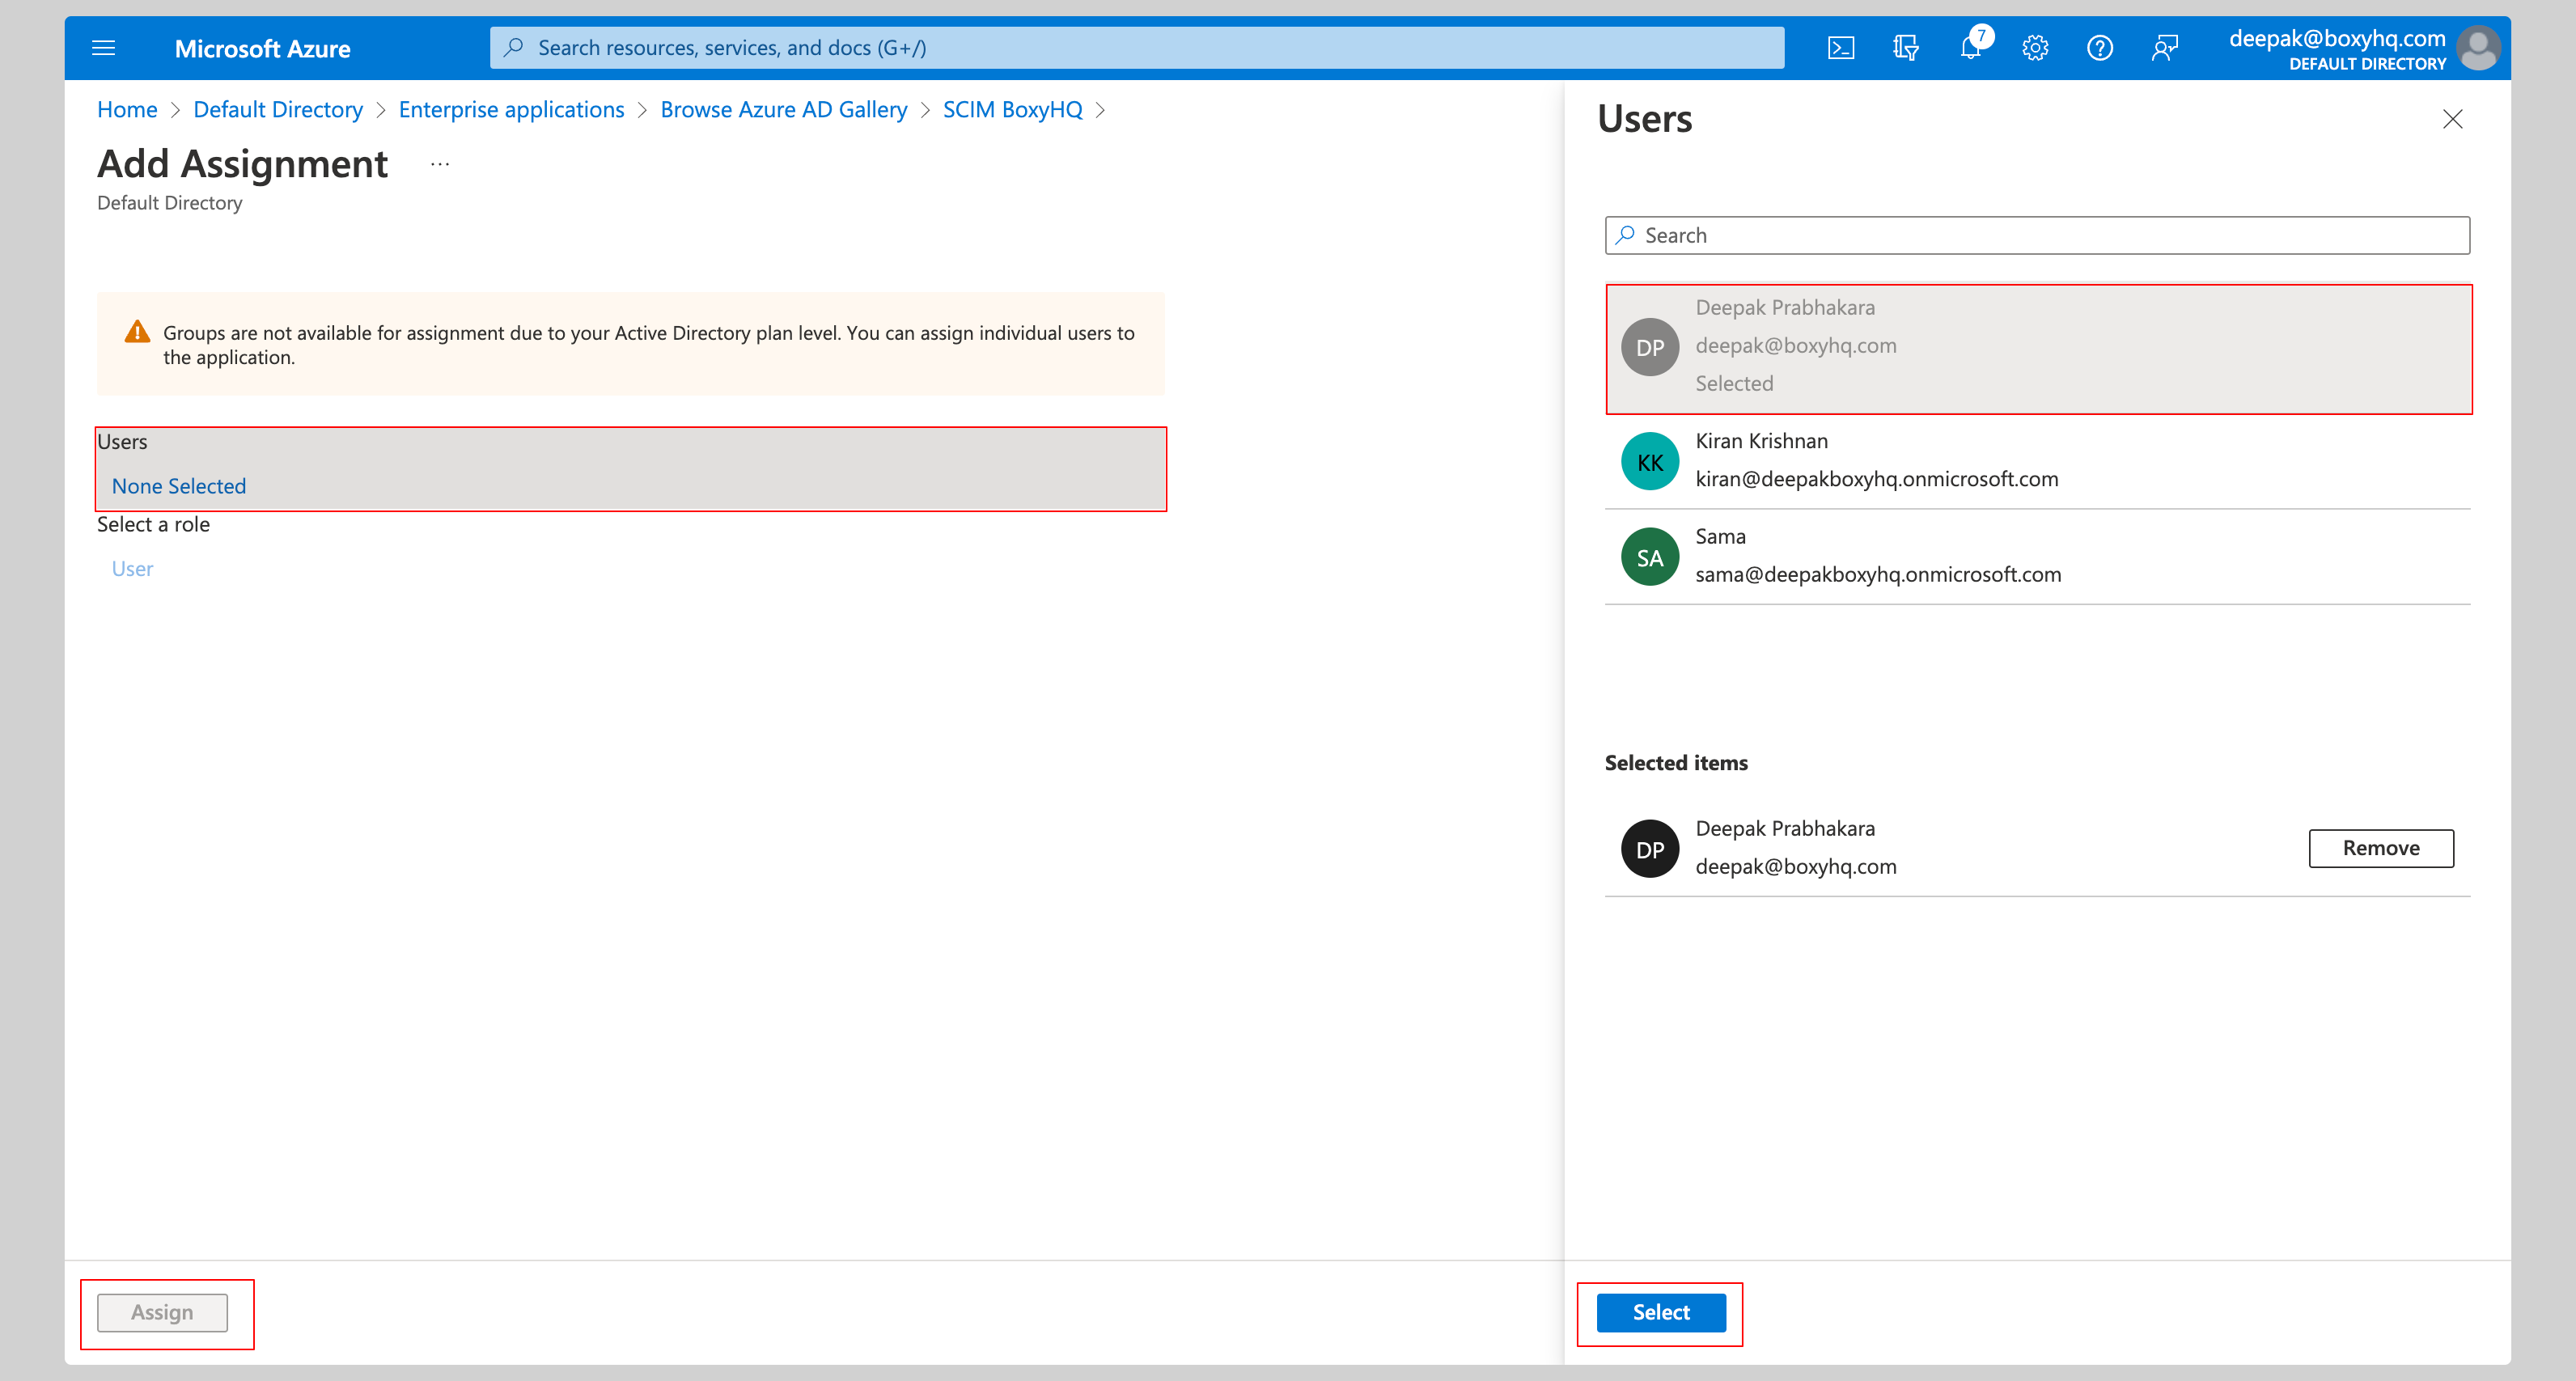
Select None Selected under the Users.
From the right side of the screen, select the users you want to assign to the app and click the Select button, then click Assign to those users to the app.
FAQ
How frequently does Microsoft Entra ID SCIM perform sync by default?
Microsoft Entra ID automatically provisions and updates user accounts in an app based on things like user and group assignment. The sync happens at a regularly scheduled time interval, typically every 20-40 minutes.
Why does the PATCH request fail in Microsoft Entra ID SCIM?
This is a known issue with Entra ID SCIM implementation. You have to add the query param ?aadOptscim062020 to the SCIM endpoint
URL to make PATCH requests work. This query param update PATCH behavior and ensure SCIM compliance.
Read More
Why is a custom attribute not showing up in Ory Polis?
If you map a custom attribute and it doesn't appear in the user record in Ory Polis, the cause is almost always on the Microsoft Entra ID side. Ory Polis stores every attribute it receives under the schema it arrives in, so a missing attribute means Entra ID didn't send it. Check the following in Microsoft Entra ID:
- The source attribute has a value. Microsoft Entra ID
doesn't provision null values.
If the mapped source resolves to empty (shown as
undefinedin the provisioning view), Entra ID sends nothing. Directory extension attributes (extensionAttribute1–15) are often empty on cloud-only users and can only be set through Microsoft Graph or Exchange, not the user profile page. - The mapping applies to updates. Set Apply this mapping to Always so the attribute flows on both create and update. Entra ID only re-sends an attribute when its value changes, so change the value — or restart provisioning — to force a fresh sync for users that already exist.
- Custom attributes may be sent on update, not on create. Microsoft Entra ID can omit custom attributes from the initial
create (
POST) and send them in a later update (PATCH). Use Provision on demand against a user that already exists to trigger an update. - Use a custom extension schema for non-standard attributes. The enterprise extension schema
urn:ietf:params:scim:schemas:extension:enterprise:2.0:Useris reserved for the RFC 7643 attributes (employeeNumber,department,manager, and so on). Define your own attributes under a custom namespace such asurn:ietf:params:scim:schemas:extension:CustomExtensionName:2.0:User:CustomAttributethrough Edit attribute list. Read More
To see exactly what Microsoft Entra ID sends, open Provision on demand (or the Provisioning logs) in the Azure portal and review the Modified attributes for the user.